Showing posts with label Veggie. Show all posts

Monday, September 28, 2009

Paella falsos:

Yes, that is spanish for fake paella. I decided to call this dish that because my first choice of description, tomatoey-rice gruel, didn't have that certain ring to it. Either way, I'm still not entirely sure what exactly this dish is. A quick history of it's creation.

A couple of months ago, when the chard in my garden was growing full steam ahead, I harvested what was probably about 2.5 lbs. worth. Now, by this point in the season, I was getting a little sick of chard to be quite honest, so I kept having to find new ways of using it. Since it was close to the end of the month, a time when I generally cut-off my grocery shopping as a means to force clean out my fridge and cabinets, I had limited provisions on hand. Like most, I have a group of staples that I always keep around, of which rice and whole canned tomatoes are a part of. I also have been keeping skinless turkey sausages in my freezer as they're rather utilitarian meat for a number of dishes. So, there it was, chard, rice, canned tomatoes, and turkey sausage... what the heck can you make with that?

Paella falsos:
1 33oz. can of whole peeled tomatoes
1 cup rice (any kind will do, I used long grain)
1-2 lbs. chard, washed
6 oz. skinless smoked turkey sausage
1-2 tbsp. olive oil
1-2 cloves garlic
salt and pepper to taste
1 tsp. coriander
pinch saffron
  1. Remove the stems and central rib from the chard and chop or tear into roughly 1 inch square pieces. Mince the garlic and heat the oil in a soup-pot till shimmering, then add in the chard, garlic, and coriander and cook for ~5 minutes.
  2. Add in the rice and ~1/4 tsp. salt and stir to coat each grain in oil. Pour the liquid from the tomatoes into a bowl and reserve. Seed and chop the tomatoes into small pieces. When the rice is translucent, pour in the tomatoes and juice. Bring the pot to a boil.
  3. Slice the sausage into small, bite-sized pieces. When the pot reaches a boil, add the sausage and the saffron and drop the heat to medium. Cook, uncovered, for a good 30 minutes, stirring occasionally. After 30 minutes, the mix should be thicker as the rice absorbs the tomato juice, adjust the final seasoning now while there's still some liquid left.
  4. Now, there are two ways to finish this. The first, as I did it the first time, is simply to keep heating it in the pot, creating a crusty bottom. Alternatively, you can transfer some to a non-stick skillet and achieve the same effect.


IMG_0948
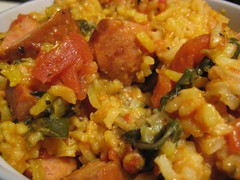
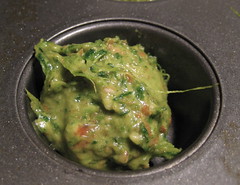
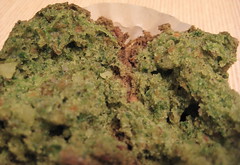
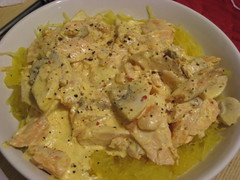
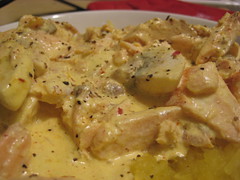
It's hard to get a nice picture of this, this was the best I could do.


So, the reason I call this fake paella is simply because it's like paella in principle, but I certainly didn't plan it that way and no Spaniard would ever mistake this for the real thing. The end result, however, is a really delicious, tomatoey-savory rice dish wish a crusty bottom, so fake paella. I've made this a few times since its first accidental creation, and I haven't really made any changes to it yet. It may not look all that great, but do yourself a favor and try it, I think you'll be quite pleasantly surprised.

Well, that's all I have this time, I'm back to finishing a manuscript again, but I'll try to post again this coming weekend if I have time.

Cheers,
Mike :)

Wednesday, April 29, 2009

Tempura: tasty fried things

So, I know I promised this over the weekend, but Saturday was too nice to stay indoors so I worked on getting my garden ready for full planting, did some misc. outside housework, and went for a good long bike ride. Sunday I was unfortunately in my lab all day and didn't have the desire to write a blog post afterwards. I don't even want to get into the past two days.... But this is a sort of double recipe post to make up for all that!

Anywho, two weeks ago, while everyone was busy planning for an upcoming conference that the bulk of the lab went to, we all accidentally forgot one of my lab-mates' birthday. After finding that out, we organized an impromptu trip to his favorite Korean restaurant (he's Korean, so you know it was authentic and good). I ordered the tempura lunch box (essentially a bento box) as something different from my usual. Since then I've been wanting more, but haven't had the time or money to go to lunch and order it. Time to dig out the dutch oven and frying oil!

Tempura is simply a method of lightly frying pretty much anything. Its not dense like many fried foods in America, and it often consists only of vegetables and shrimp. Its light, puffy, and you don't feel loaded down after eating a couple of pieces. The key to all of that is the batter. Tempura batter is made quickly using a low gluten flour (sorry, no whole wheat tempura) and kept cold. This lack of gluten causes the batter to puff when fried, not become chewy and dense. Served with traditional dipping sauce (you can find it bottled in your local asian market) and its near heaven (if you're on a tempura bender like I was last week).

Tempura shrimp and vegetables:
1.5 cups flour (preferably pastry, but AP will do)
1 tsp. salt
1 tsp. baking powder
1 cup ice water
3-4 ice cubes
1 egg
stuff to fry (see tips below)
2 quarts oil for frying
  1. Divide the flour, adding 1/2 cup to a shallow bowl (for coating the pieces before dipping) and the rest to a mixing bowl. Add the salt to the coating flour and mix with a fork to combine. Add the baking powder to the mixing bowl and mix. Start heating the oil to 375F in a dutch oven or fryer.
  2. Coat the food pieces to be fried lightly with the coating mixture and set on some paper towels. This and the salt will remove some of the moisture from the pieces which will help them fry better.
  3. After everything is coated, quickly wisk the egg with the ice water and add that and the ice cubes to the mixing bowl. Mix for only a few seconds. Your batter should be lumpy as in the picture below.
  4. When the oil is at the right temp. dip the pieces, shake off some excess batter and carefully add to the fryer. Like most fry jobs, they'll sink first and float to the top as they cook. Depending on the size of the piece and what it was (raw seafood vs. vegetable) you'll need to time it accordingly, just remember that if the sizzling stops, then you've gone too far and oil is going in instead of water(steam) coming out. Remove finished pieces to a cooling rack laying on top of paper towels and then serve asap or keep warm in a 100F (toaster)oven.


Tips:
Shrimp will tend to curl when cooked, so skewer them before dipping in the batter. Save anything raw like the shrimp for frying last as well so you don't have any cross contamination issues. Slice your veggies thinly (or fruits, you can do bananas from what I've read) so they cook quickly and don't get mushy. Your batter may separate a little, just give it one or two quick stirs to pull back together. Use a fine meshed strainer to remove all of the little bits of batter that come off so they don't burn and cause nasty flavors. After your fry session, pour the oil back into the original container through a coffee filter to remove any small bits you don't want staying around. The oil should be good for 3-4 more uses, just don't try using it in cakes.

TbF Images - 258
What I used, lotus root, zucchini, bell pepper, eggplant, and shrimp.


TbF Images - 259
See how the batter is lumpy, thats what you want. Keep it cold!

TbF Images - 261
Tempura eggplant and zucchini, notice how the batter is thin and puffy?


So, restaurant tempura will probably always trump my own, simply because it's a bit of a hassle (deep frying is always a chore at home). But for those times when I really feel like I can't live without tempura for dinner, I have my own method that works pretty darn well. I'm also excited because I've got a recipe in mind for using up the extra lotus root and eggplant that I didn't use, so look forward to that assuming all goes well.


Ok, so I promised a second recipe, and here it is... although I'll admit it's barely a recipe.

Rasberry Acai sorbet:
2 33 oz. bottles Tropicana Pure rasberry acai juice
2 cups sugar
1 cup water
  1. Add the sugar and water to a saucepan and bring to a boil. Boil for 5 minutes and then cut the heat and cool. You've just made standard simple syrup!
  2. Combine the simple syrup and juice in your ice cream maker and let it go.
  3. Enjoy the awesome deliciousness that you've just created, or pack it into a container and freeze to harden.


Told you it was barely a recipe. But I got two bottles of the juice on managers special for a grand total of $5, the sugar probably cost me 50 cents, and I came out in the end with a half gallon of sorbet that if you bought pre-made would cost a lot more and have a lot more "stuff" in it. So those of you who don't have an ice cream maker yet.. GET ONE! Because I've got a bunch more ice cream recipes in the pipeline and you'll only feel sad if you can't make them yourself.

Monday, March 2, 2009

High-Fibre Veggie Muffins

A few weeks ago I got an email from Diann, the lovely author of Eat'n Veg'n, that I was the lucky winner of the Lexen Juicer that she was giving away. Well, much to my delight, it arrived last Thursday, and while I've had it less than a week, and only used it 4 times, I'm already growing quite fond of it. The manufacturer bills it as a wheatgrass juicer, but to get technical its simply a masticating type juicer. This means that much like how a cow slowly grinds and chews its cud, the juicer slowly grinds whatever you put in it to get the "juice" out. Again, just like a cow, this works great on fibrous and leafy plants such as (wheat)grass or spinach, but not so much on oranges (ok, it does work on them, just inefficiently).

My new juicer, as supplied by 877MyJuicer thru Eat'n Veg'n


Problem is, after juicing some lovely greens, what are you to do with the "waste" fibre? Sure you could throw it in your smoothie along with the juice, but that would pretty much defeat the purpose of the juicer in the first place. You could make some lovely vermicompost, but unless you have some know-how, it could easily end up stinking up your house. Throwing it in the garbage is simply wasteful. Alas, including it in a recipe is the only solution. But what recipe calls for undigestible plant fibres in the ingredient list? Well, very few in all honesty, but that doesn't mean there aren't any.

There are a number of baked goods that call for vegetables in one form or other. The squashes (both summer and winter) are well known for their breads. And everyone and their mother (pretty much) has had carrot cake before. They're both simply a simple batter with a bunch of shredded veggie. Simple, homey, delicious, even without the near requisite cream cheese icing in the case of carrot cake. Well, carrots and squashes are vegetables, and pretty fibrous too boot, so try to guess where I'm going with this...

High-Fibre Veggie Muffins:
1/2 cup vegetable shortening
1 cup brown sugar
1 egg (can be substituted to make vegan)
1 tsp. vanilla
1 cup juiced spinach and/or carrot fibre*
1.5 cups cake flour
1/2 tsp. salt
1/4 tsp. baking powder
3/4 tsp. baking soda
1 tsp. cinnamon
1/2 tsp. ground nutmeg
1/2 cup chopped almonds

*I juiced a 1lb. bunch of spinach, leaves, stems, and all, and 3 medium carrots (the carrots where shaved into thin strips with the peeler prior to juicing) which yielded the above 1 cup, you could just use frozen spinach and squeeze as much liquid as possible out and grate some carrot but your batter may need more flour because of the excess liquid.

1. Set the oven to 350F. Cream the shortening and the sugar till thoroughly incorportated. Beat in the egg until creamy.
2. Add the vanilla and fibre and mix by hand. You want to get the fibres as broken up as possible so they're not in big clumps (no one likes clumpy muffins... no one). Sift the dry ingredients together, withholding the nuts.
3. When the fibre is evenly distributed, slowly add in the flour, mixing till near fully incorporated into the batter. At this time add the nuts and mix just enough to distribute evenly.
4. Distribute the batter into muffin tins and bake for between 30-45 minutes (I made mini- and regular muffins, the minis were done ~30 mins, the regulars near 45). You know they're done when the tops begin to brown a little and a toothpick comes out clean.

TbF Images - 202


Ok, so I'll be honest, that doesn't look like the most appetizing thing on earth. In fact, with the little bits of plant fibre sticking out, and the unnaturally natural bright greenness of it all, it almost looks like something only a cow would eat. But as most people know, its what comes out of the oven that matters...

TbF Images - 205


Mmmmmm. Still spinach green with dots of orange, but totally delicious. I'm too lazy to do a dietary fibre/muffin calculation, but you can trust me when I say that one of these in the morning with your fruit and vegetable juice smoothie will certainly get you close to your daily requirement (thats ~30g/day FYI). And to cop a line from Fiber-One, they don't taste like cardboard. In fact, because of the sugar and spices, you'd never know how good for you these babies actually are. Now yes, if you wanted to make them even healthier you could replace the sugar with Splenda or some other non-nutritive sweetener, but in reality the soluble and insoluble fibres in the muffin actually drastically slow the absorption of the sugar into your blood stream in the first place. The only good case I can make for not using sugar at all is to make these less appetizing so you don't eat more than one at a time, which can lead to, shall we say, unpleasantness in some situations.

So, a final shout-out and thank you to Diann for the juicer, I hope you enjoy my thank you recipe, even if its not vegan (I'm sure those who are know good egg substitutes). As for everyone else, just because its veggies in a muffin doesn't mean you should be afraid, heck, you can always un-healthify if by adding cream cheese frosting.

Thursday, February 5, 2009

Pickled broccoli stems

I doubt this needs even more publicizing, since the NY Times is one of the most widely distributed and read papers in the US, if not the world, but I feel compelled since its pretty awesome. This past Tuesday, as part of the Recipes for Health series, Martha Shulman wrote about making Pickled Broccoli Stems. Its one of those recipes that when you find out about it (and even more so when you try it) you just go "Duh, why did I never think about that?" I made it up last night, peeling the stems and salting them overnight. This morning before going to work out I poured off the liquid from the stems, and poured on a mix of 1 tbsp. rice vinegar, 2 tsp. olive oil, 2 very finely minced garlic cloves, and teaspoon of chili paste.

All I have to say is yum. And what makes this recipe so great, aside from how horribly easy it is, is that it uses what would normally be thrown in the trash (at least by most people). The hard outer skin of the stem is rather bitter, and the stems themselves are pretty bland. Peeling away the skin (which isn't as easy as doing a carrot but still pretty simple) removes the bitterness and the salting explodes some of the cells of the stem, making them tender without cooking. I'm going to have to keep stocked up on broccoli now and try some other flavor combinations out. I know, President Bush the First would be appalled, but maybe if he had tried this first he would have never banned it from Air Force One.

Friday, December 19, 2008

Make your own sushi:

Sushi always seems to be one of those hot topic foods no matter what the actual topic is. People debate where the best place to go for it is. People debate the best kinds to get. People debate the proper way to eat it. People debate the ecological costs associated with the overfishing of blue-fin tuna specifically for sushi. Actually, that last one isn't talked about enough I feel, even if it is the most important. I'll leave my opinions on that issue for another post next week, because for all the discussion on sushi, making it at home always seems to be the biggest debate always seems to be about making it yourself at home.

Its natural to be wary of making your own sushi. Fish and other seafood have a nasty reputation for carrying unwanted bacteria (and in the case of some shellfish, viruses such as hepatitis). Now, that reputation, while partly true (fish will spoil much quicker than other meats) is also less of a concern now due to the rising quality of fish available in your local market. If I have some extra money in my budget, I'll go to Whole Foods and chat with the people at the fresh fish bar to see what they recommend as the freshest fish. And when I don't have that extra freedom, I go the faux-crab and smoked salmon route. And there's always vegetarian sushi.

So how do you make sushi? What kind of expensive or odd equipment do you need? And what bizarre and expensive do you need to buy? Well, let me set your fears at ease: Sushi is easy to make, using simple (cheap) base ingredients and the utensils and equipment you probably already have in your home! Below I'll show you how I do it and how simple it can be for you too.


TbF Images - 33

The basic ingredients that I used are shown above: cucmber, avocado, left over smoked salmon, and faux crabmeat. In the background in the bag are sheets of nori, pressed sheets of algae (its not seaweed actually) that you wrap the roll in.

1. Step one is to make your rice. You'll want a high quality sushi/short grain rice that has been well rinsed to removed the dust that will naturally accumulate. Place 1 cup of rinsed rice in a pot with 1 cup of water and bring to a boil. Once it does, drop the heat to low and cover. After 15 minutes remove from the heat completely and let the rice sit for 10 minutes. During that 10 minute rest, place 1 tbsp of rice vinegar and 1 tbsp sugar in a small dish with a small pinch of salt and microwave for 30 seconds. After the 10 minutes, transfer the rice to a bowl (preferably wood, glass, or stainless steel in that order) and pour the vinegar over the rice. Using a wooden spoon, mix up the rice to get it all coated and quickly cool it to room temp.

TbF Images - 35


2. Once the rice is done, the rest of the job is assembly. Place a sheet of nori on a flexible silicone baking mat and cover all but a 1 inch strip at the end farthest away from you with rice.

TbF Images - 37


3. Lay down your ingredients at the end closest to you, making sure not to add too much or else you'll overload the roll.

TbF Images - 40


4. Using the mat, roll the end with the ingredients over onto itself, pushing excess mat ahead of you. Keep even and firm pressure on the roll, moving your hands to the edges slowly from the center with each roll. Once you've reached the end, use your fingers to firmly push on all sides to get the nori wet from the rice, which is what will seal the roll closed. Use a long, thin bladed knife and a short sawing motion to slice the roll into roughly 1/2" sized pieces.

TbF Images - 41 TbF Images - 42TbF Images - 43TbF Images - 44


To serve, do it however you want and will enjoy it. I prefer the dish of soy sauce with some wasabi mixed in route.

Suhsi 1


If you don't have a silicon baking mat, you could probably get away with using a sheet of parchment paper. There absolutely no need to have a specialty bamboo mat that you'll rarely use. And don't even bother with those kits that sell for $50 or so that claim to give you everything you need and will ever want. The rice can be bought in bulk from Whole Foods for cheap, nori is fairly inexpensive (especially if you buy it at an asian market), and you can dictate how much you spend on the fish depending on what you want to buy. So if you've ever thought of making your own sushi but were either too afraid to try it, or didn't want to deal with specialty equipment and ingredients, take heart, its not the big mystery your local sushi restaurant wants you to think it should be.

I'm on break till the end of the year to see family, so posting might be light, so I'll take the opportunity now to say Happy Holidays everyone!

Thursday, December 11, 2008

Salmon with mushrooms and spaghetti squash in saffron sauce

Proving that I do more than bake, I'm offering my first "dinner" recipe. Now, I meant to have this posted last night, but I just started Netflix and got my first disc of the old Doctor Who series, so yeah last night was really unproductive. Sort of. But that will be for a later post.

I'm not sure why so many people I meet either outright hate or strongly dislike fish. Growing up in DE, and having family scattered along the Eastern Seaboard, seafood was naturally a part of my diet growing up. I've presumed that its because I now live in the "midwest" and thus really fresh seafood is a bit lacking. But its 2008 (for a little while longer at least) and modern transportation means that even the Kroger down the street from me has pretty decent fish fillets and shellfish. Maybe its an unsolvable mystery like reconciling quantum theory with Newtonian physics... or how many licks it takes to get to the center of Tootsie Roll Pop™.

Either way, I love fish. And shellfish. And even things that remotely fall into that category such as caviar, escargot, frog legs, 'gator, conch. I'm game for any of it. So, what happens is that whenever I go to the grocery store, I check out the seafood case. Now, being a graduate student, fish should be a luxury since its not the cheapest source of protein by far. To reconcile these two facts, I've taken to only buying items on managers special. They don't look the best, but you often have a good day, maybe two before you should pause before using it. And its half the price for what is still good quality food. So on a recent trip I found some nice sized salmon filets and picked two up. Now, when you buy any meat, and especially seafood knowing you need to use it within a day or two, you often need to get creative with what you make depending on what else you have available.

In my case, it was some left over spaghetti squash and some managers special mushrooms that I had picked up as well. I could have gone the easy route, sauté the mushrooms, broil the salmon with a quick garlic/olive oil glaze, re-heat the squash, throw it all together with a light drizzle of olive oil and some fresh pepper, and call it a night. But I remembered a recipe Mark Bittman posted on his blog once about fish with a saffron sauce made with yogurt. Since I generally have yogurt around since I usually make my own, I figured I'd give it a whirl. Now, his recipe calls for making the saffron sauce, and then drizzling it on cooked halibut filets. I of course changed it up a bit.

Salmon with Mushrooms and Spaghetti Squash in Saffron Sauce:

Saffron yogurt sauce:Saffron Salmon 4
1/2 cup yogurt*
1 pinch saffron threads
couple grinds of pepper
1/4 tsp. dill

Combine ingredients in a small cup or bowl, crushing the saffron as fine as possible. Incubate at room temperature for ~1 hour. The sauce should take on a faint yellow/orange color.
Saffron Salmon 5

Notes: You can make the sauce a day ahead of time and incubate in the fridge to amp up the flavor.
*As I said, I make my own yogurt. I'd suggest using full fat or even greek, especially if you heat it like I did. If you want to use low/no fat, you'll probably want to drain it to remove as much extra liquid as possible.

Pan seared salmon, mushrooms and squash:
~1 cup spaghetti squash previously pulled into threads
1 salmon fillet
3 large crimini* mushrooms sliced
salt and fresh ground pepper as desired

Heat a non-stick pan over high heat. When hot, place the salmon fillet skin side up and sear the top for 1-2 minutes. Turn over and drop the heat to medium and cook till salmon is cooked through (time will depend on the thickness of the fillet). While the salmon is cooking, add a small amount of olive oil to a sauté pan over medium heat. When oil is fragrant, add the mushrooms and squash and cook till heated through. When salmon is done, remove skin and cut into small chunks. Add salmon to mushrooms and squash and add saffron sauce. Raise heat to high and cook just till the sauce is hot. Eat, enjoy.

Saffron Salmon 1


My thoughts:

I liked the combination, and the saffron was still present but a bit muted by the stronger flavor of the salmon. I didn't follow the exact method I described above. I microwaved my squash and topped it with the salmon and mushrooms which has been cooked in the sauce. In retrospect, this caused the meal to be a little watery as the squash gave up liquid which I didn't drain off. If you cook the squash with the mushrooms, they should absorb the liquid and thus you shouldn't have that problem.

Saffron Salmon 2


I've got a lot more recipes coming in the following weeks, one of which I'm still trying to perfect but I'm super excited about sharing when its done. So if you're enjoying this blog as much as I am so far, great. Share it with all your friends. And family. And co-workers. Heck, even strangers.