Wednesday, November 18, 2009

Bacon and Lentil Soup

So, it's mid-November, and that means cold dreary weather. Except, lately it's been rather warm here in central Ohio. I mean, it was 70°F this past weekend! Most people would be quite pleased with that, but for myself, I'm ready for winter soup season, and I want my weather to cooperate. But since I haven't yet figured out how to change the weather, I might as well get started on the soup making.

Last month I did a simple tomato soup that you hopefully read about (and made, and enjoyed!). Well, this time I'm back with another simple soup. How simple you ask? Well lets see, there are 7 ingredients, and one of them is water. You make it all in one pot in about an hour. And you probably (or at least should) have all the ingredients handy all the time. I say that last bit because everyone should have at least two containers of lentils in their cupboard (red and puy being the two). And only crazy people don't keep bacon around.

As you'll quickly see, what makes this soup so great is that it's ridiculously easy to prepare. Crisp up the bacon, cook the veggies, then add water and the lentils. In about than an hour you're eating. So lets get too it!

Bacon and lentil soup:
1 lb. pepper bacon, chopped
1 medium onion, sliced
2 ribs celery, chopped
2 carrots, coined
1 larger potato, cubed (pref. yukon gold)
1/2 cup puy lentils
4-6 cups water
  1. Put your soup pot over medium high heat and add the bacon. Cook until it crisps up then add the carrot and potato.
  2. Cook another 2 minutes then add the celery and onion. When the onion turns translucent, add the lentils and enough water to completely cover the other ingredients. Bring to a boil and then let simmer ~45 minutes.
  3. When the lentils are plump, the soup is done. Dish into bowls and enjoy!
IMG_0970
Mmmmm, yummy soup...


That was easy huh? Told ya so. Now, I know what you might be thinking... a pound of bacon, water, no salt?! Yup, yup, and yup. You see, the bacon serves a couple of roles here. The first is to provide fat for cooking the veggies. The second is to add tons of flavor. And by using pepper bacon, you've got all the seasoning you need (bacon naturally has a good amount of salt). Now, in case you're wondering, puy lentils are sometimes referred to as french lentils. I suggest buying them in bulk from Whole Foods or a similar store than a normal grocery store. Just look for the greenish/blueish ones you see below.

IMG_0972
Puy lentils, unlike red, don't get mushy when cooked, so don't substitute the two.


So, when you're in a bind, and need a fairly fast, incredibly easy, and extremely tasty dinner, give this soup a try. I can promise you that you won't regret it!

Till next time,
Cheers,
Mike :)

Wednesday, October 28, 2009

Double Chocolate Bread Pudding:

So, lets see, I get my manuscript off to my advisor to review, think I have at least a week of down-time... and I get sick. And waiting for me when I get better... revisions! Gah, the last year of grad school really is a vicious cycle of writing and trying to have a life.

Oh well, I'm back now, and with a dessert that will definitely wreck any diet you may happen to be on. My history with this particular bread pudding goes back to the beginning of the year. Coming back from my winter vacation with my mom's forgotten bread maker, I now had the means to craft all sorts of breads in my rather busy and chaotic schedule. One such bread was a brownie bread that made for great eating all on its own, but I knew would make an excellent base for bread pudding. Of course, time went buy and I never got around to it (as usual). That was, until a few weeks ago when on Throwdown with Bobby Flay they had a challenge based on chocolate bread pudding.

In that episode, Flay had to best The Dessert Truck, a NYC food wagon specializing in desserts but best known for their chocolate bread pudding with bacon crème anglaise. He lost, over-complicating things by adding coconut and a passion fruit syrup. Both contestants, however, used normal white bread (ok, brioche) and made it chocolate by adding chocolate to their custard for the pudding. You can see where I'm going with this...

Double Chocolate Bread Pudding:

For the bread:
2 tsp. yeast
3 cups bread flour
1/2 cup cocoa powder
3/4 cup sugar
1 tsp. salt
1 egg + 1 yolk
2 tbsp. butter
1 cup warm water
  1. Either put all the ingredients in a breadmaker and run on large loaf normal or follow the rest of the instructions.
  2. Add the yeast to the water with a pinch of the sugar to get it going. Sift together the flour, cocoa powder, sugar and salt. Combine the egg, yolk, and butter in a small bowl and add to the dry mix.
  3. Pour in the yeasty water and mix for about 5 minutes to incorporate well. Incubate in a warm place for 30 minutes.
  4. Pre-heat oven to 350°F. Knead dough for 5-10 minutes and incubate another 15.
  5. Add to greased loaf pans and bake in oven for ~45 minutes to an hour till set (No set time seems to work best for me).
  6. Leave the bread (no matter which way its made) out on your counter for a day (or two) to harden before trying to use in the pudding.

For the pudding:
Bread from above, cut into 1/2" cubes
2 cups heavy cream
2 cups milk
4 eggs + 2 yolks
2 tsp. vanilla extract
1 cup sugar
8 oz. dark chocolate, chopped up
  1. Combine the cream, milk, sugar, and vanilla in a saucepan and heat over medium/high heat just till it bubbles, stirring occasionally. Add the chocolate slowly and stir throughly to integrate.
  2. Whisk the eggs and yolks really well till they're pale in color in a large bowl. Slowly add the chocolate cream mixture, whisking constantly to prevent the eggs from cooking.
  3. Add the bread cubes to the custard and toss thoroughly. Pour everything into a 13x9 baking pan, distributing the bread evenly. Pre-heat the oven to 350°F now.
  4. By the time your oven warms up, the custard will have completely soaked into the bread. Give the pan a jiggle to even things out, and then bake for 35-45 minutes (this depends on how dense your bread was, but you're looking for a firm top that gives a little when pressed).
  5. Find lots of friends to share with...


IMG_0964
Brownie bread, just waiting for some custard.


IMG_0968
The final, ungodly delicious product.


So, there you have it. Straight out of the oven, the top is all nice and crusty, while the bottom is like warm chocolate mouse. You could top it with some crème anglaise, but quite frankly, this is sweet and rich enough as it is to stand on its own. If you can't find people to help you eat this all right out of the oven, don't worry, after a day in the fridge, the whole thing turns into a homogenous creamy, chocolatey mass of awesome. As I said at the beginning of this, say good bye to your diet, at least for a week.

I'm hoping to have time to post again next week, but no promises about anything from now on. Hopefully by the time I do post you'll all have recovered from your sugar coma's after making this.

Cheers,
Mike :)

Thursday, October 15, 2009

Simple Tomato Soup:

This post is going to get to the point since I have a Friday deadline to get a manuscript out for review.

IMG_0956


Simple Tomato Soup:
2 lbs. tomatoes
3 slices pepper bacon
1/4 onion, diced
3 cups chicken stock --or--
3 cups water + assorted chicken bits (wings, necks, etc.)
~2 tsp. salt
1 cup whole milk
  1. Peel, core, deseed and chop the tomatoes into small pieces. You can use nearly any type of tomato here, I had a mix of yellow, red, and green from my garden. A good tip is to deseed over a strainer in a bowl so you can catch the juice and add it back in for more flavor.
  2. Cook the bacon in your soup pot till crispy and then drain on paper towels. Pour off the fat, keeping about 1.5 tbsp. Add the onion and tomatoes and cook until well broken down (~15-20 mins).
  3. Add the stock, or if you're out like I was, water along with some chicken pieces you usually use for making stock (you'll fish them out later, they're just there for flavor). Bring the pot to a boil and then let simmer for about 30 minutes, stirring 3 times or so.
  4. After the 30 minutes is up, remove the chicken bits if necessary, and adjust the seasoning. When cooled down a bit, puree with an immersion blender or in a normal blender till smooth and creamy in consistency.
  5. Add milk to lighten the color and make it a little smoother. You can go with heavy cream here, but whole milk keeps it lighter and as long as you don't over heat it, won't curdle.
  6. To serve, top with some crumbled bacon and possibly some croutons (I prefer bread on the side, but thats just me).


Ok, so I've got another soup recipe to post some time, as well as some baking type recipes.. I'm hoping that once this manuscript is off I'll have at least a week to do something I actually want... No clue when next time will actually be, but till then...

Cheers,
Mike :)

Monday, September 28, 2009

Paella falsos:

Yes, that is spanish for fake paella. I decided to call this dish that because my first choice of description, tomatoey-rice gruel, didn't have that certain ring to it. Either way, I'm still not entirely sure what exactly this dish is. A quick history of it's creation.

A couple of months ago, when the chard in my garden was growing full steam ahead, I harvested what was probably about 2.5 lbs. worth. Now, by this point in the season, I was getting a little sick of chard to be quite honest, so I kept having to find new ways of using it. Since it was close to the end of the month, a time when I generally cut-off my grocery shopping as a means to force clean out my fridge and cabinets, I had limited provisions on hand. Like most, I have a group of staples that I always keep around, of which rice and whole canned tomatoes are a part of. I also have been keeping skinless turkey sausages in my freezer as they're rather utilitarian meat for a number of dishes. So, there it was, chard, rice, canned tomatoes, and turkey sausage... what the heck can you make with that?

Paella falsos:
1 33oz. can of whole peeled tomatoes
1 cup rice (any kind will do, I used long grain)
1-2 lbs. chard, washed
6 oz. skinless smoked turkey sausage
1-2 tbsp. olive oil
1-2 cloves garlic
salt and pepper to taste
1 tsp. coriander
pinch saffron
  1. Remove the stems and central rib from the chard and chop or tear into roughly 1 inch square pieces. Mince the garlic and heat the oil in a soup-pot till shimmering, then add in the chard, garlic, and coriander and cook for ~5 minutes.
  2. Add in the rice and ~1/4 tsp. salt and stir to coat each grain in oil. Pour the liquid from the tomatoes into a bowl and reserve. Seed and chop the tomatoes into small pieces. When the rice is translucent, pour in the tomatoes and juice. Bring the pot to a boil.
  3. Slice the sausage into small, bite-sized pieces. When the pot reaches a boil, add the sausage and the saffron and drop the heat to medium. Cook, uncovered, for a good 30 minutes, stirring occasionally. After 30 minutes, the mix should be thicker as the rice absorbs the tomato juice, adjust the final seasoning now while there's still some liquid left.
  4. Now, there are two ways to finish this. The first, as I did it the first time, is simply to keep heating it in the pot, creating a crusty bottom. Alternatively, you can transfer some to a non-stick skillet and achieve the same effect.


IMG_0948
It's hard to get a nice picture of this, this was the best I could do.


So, the reason I call this fake paella is simply because it's like paella in principle, but I certainly didn't plan it that way and no Spaniard would ever mistake this for the real thing. The end result, however, is a really delicious, tomatoey-savory rice dish wish a crusty bottom, so fake paella. I've made this a few times since its first accidental creation, and I haven't really made any changes to it yet. It may not look all that great, but do yourself a favor and try it, I think you'll be quite pleasantly surprised.

Well, that's all I have this time, I'm back to finishing a manuscript again, but I'll try to post again this coming weekend if I have time.

Cheers,
Mike :)

Thursday, September 17, 2009

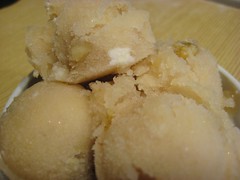
Champagne-Pear Sorbet

Ok, so I've been a bit AWOL of late, its been almost a month since my last post! But to make the long story of why very short, work > blog, so unfortunately that comes first.

But now I'm back (at least for a while...) and I've got a recipe that I'm really excited about. Anyone who's ever been to Columbus, OH, and many who've never even come close, know the name Jeni Britton (or at least the Jeni part). For those who have no clue who she is, take a moment to check out her day job. The site unfortunately does little justice to the general awesomeness that is Jeni's ice cream, sorbet, or frozen yogurt. Ms. Britton likes to push some boundaries when it comes to her creations, a current 'seasonal flavor' is celery while a standard 'signature flavor' is thai chili. So after a recent visit, I decided to try my own hand at a unique yet totally awesome frozen treat.

The key to making this type of endeavor pan out on the first attempt is to start with a flavor pairing that already works well. I don't know how or why it popped into my head, but fancy dinner desserts seemed like a good place to start. Having gone on a few cruises in my currently short lifetime, I thought about when they had the 'dessert tray', which erroneously had a plate of fruit, cheese, and nuts next to the crème brûlée and triple chocolate cake. Now that I'm older I realize adults consider a glass of champagne with an assortment of nuts, cheeses, and fruits to be a worthy dessert, and they're actually right. Since I planned on using champagne, a sorbet was a natural fit over an ice cream. And pears are just hitting their season, so like Ms. Britton I figured I'd work with what's naturally abundant.

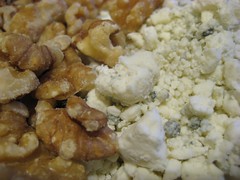
Now, a simple champagne and pear sorbet is pretty pedestrian compared to Red Beets with Lemon & Poppy Seeds, so that's where the nuts and cheese come into the picture. Having just bought a bunch of walnuts to make candied walnuts for salads, those were a natural addition. For the cheese I decided a mild crumbly blue would provide come interesting contrast to the rest of the flavors, as well as a dose of salt to intersect the sweet and tart flavor of the sorbet itself. But cheese in a sorbet? And blue cheese!? I had to do some checking with others to make sure I wasn't going crazy. After sampling an n of 3, and getting back overwhelming statistical evidence that it sounded yummy (p<0.001), I went for it... and boy am I glad I did.

Champagne-pear sorbet with walnuts and blue cheese:
1 bottle champagne (nothing fancy...)
1.5 lbs. pears (pref. bosc)
1 cup sugar
1 cup chopped walnuts
1/2-1 cup crumbly blue cheese
  1. Pour the champagne into a container big enough to hold the pears when chopped up.
  2. Peel and core the pears. Chop into smaller pieces and put into the container with the champagne. The acidity in the champagne will help prevent browning and infuse some flavor into the pears.
  3. When the pears are all chopped, let them sit in the champagne for 5 minutes and then pour the champagne into another container. Take 1 cup of the champagne and add to a small pot with the sugar. Bring to a boil and hold for 5 minutes, then cover and turn off the heat to make a champagne simple syrup.
  4. Put the pears into a food processor, blender, or food mill and purée. When done, add the pear purée, champagne, and champagne syrup to a container and put in the fridge till well chilled.
  5. Add the sorbet base to your ice cream maker and process like always. When finished, mix in the walnut pieces and blue cheese crumbles thoroughly! Pack into containers and harden in the freezer (although eating it immediately is really really good).


IMG_0946
The final product. You can see bits of the cheese (in white) and the faint darker tan of the walnuts.

IMG_0941
Pick out the dark walnut pieces and use them for something else; blue cheese crumbles shouldn't be bigger than a pencil eraser.

IMG_0947
As I said, no need to buy anything fancy. I would suggest a brut or extra brut if you have really sweet/ripe pears.


So, there you have it. The perfect fancy after dinner dessert, made into an even more perfect sorbet. I will admit, that before I made this, I wasn't too sure of how it would turn out. I mean, goat cheese in ice cream is one thing, but blue cheese in a sorbet can go horribly wrong. Fortunately my culinary intuition (or is it insanity?) was right. If the cheese really is putting you off from trying this, do yourself a favor and try this: make the the sorbet as given, and only add some nuts and cheese to half the batch. The champagne pear sorbet itself is great, especially right from the churn when the acidity of the champagne is still at full power. The nuts and cheese just give it that little push into uniquely awesome, its a recipe that Jeni Britton would be proud of... and I'm sure you'll all love it too!

New recipe to be out next week, so until then...
Cheers,
Mike :)

Sunday, August 23, 2009

Blueberry Soup:

I'm sorry, but it's about time we all admitted it, summer will soon be over. I know, I know, *groan*... But the sooner you accept that the end is coming the sooner you can start preparing yourself. Now, what makes summer so great is that it's the one time of the year when fruits are not only abundant, but also cheap. Seriously cheap. $10 for a 5lb. box of blueberries... how many do you have?! The flavor is also far superior to those overpriced hothouse or imported blueberries you find in your local grocery store in the dead of winter. Problem is, while blueberries are awesome, there's only so many you can realistically eat over the course of a summer before you turn into Violet Beauregarde. Sure, you can freeze them on a baking sheet till they're rock hard, then plop 'em into a ziptop bag and store them in your freezer. But frozen blueberries only have so many uses, and most of those involve baking (not that I have any problem with that of course).

Winter is known as the season of soups (to me at least, among other things it's known for), so why not make blueberry soup? Soup, made from blueberries... sounds crazy doesn't it. But think about it for a second, gazpacho is a chilled soup made with tomatoes, and I distinctly remember having chilled strawberry soup on a cruise once, so who's to say why not. Plus, you'll greatly appreciate that fresh blueberry taste in the dead of winter. So why post it now? Because now is when you need to prepare! The recipe essentially starts by making a blueberry syrup base that you then add either yogurt, or sour cream, or crème fraîche to thicken. So you can buy a ton of blueberries now while they're super cheap and at the peak of flavor, make the syrup base, freeze it in small containers till needed, then pull one out and add your thickener of choice.

Blueberry Soup:scale recipe as desired.
2 pts. blueberries
1 cup water
1/2 cup sugar
1 tsp. cinnamon
1/2 tsp. nutmeg
1/4 tsp. salt
yogurt/sour cream/crème fraîche (amount can vary to taste)
  1. Wash and remove any stems from the bluerries. Heat the water, sugar, and spices in a medium saucepan till boiling. Add in the blueberries and cook over medium high heat till the blueberries have broken down and the liquid is a dark purple color, ~5-8 minutes.
  2. Very carefully transfer some of the blueberry liquid to a blender and process until smooth, or use an immersion blender if you have one. Strain the mixture through a sieve into a clean container and either freeze if you plan to store or put in the fridge for sooner usage.
  3. To make the final soup, mix about 1 part blueberry base with 1 part thickener of choice. I prefer using a 1 to 0.75 mix of base to vanilla yogurt, but feel free to experiment to get the consistency and taste you prefer.

IMG_0911
Hooray for blueberries! $1/pint, sign me up!!


IMG_0916
The final product as I prefer to serve it. Not too thick, not to thin, but loaded with blueberry flavor.


So, there you have it. My not very secret tip for surviving the dreaded mid-winter fruit depression. With a little bit of planning (seriously little) and a smidgen of effort, you can enjoy the wonderful taste of blueberries in the middle of that snowstorm that will be dropping 8" of snow come January (note, I claim no responsibility if that actually happens). And don't worry, you can still have your regular heart-warming chicken noodle or beef stew, this actually works great as a dessert in lieu of ice cream (I know, sounds treasonous, but it is). So, take advantage now while blueberries are still in season to stock up, and don't forget to freeze some on baking sheets for use in baked goods too!

Cheers,
Mike :)

Monday, August 10, 2009

Cajun shrimp

A few days earlier than I promised, but hey, that can't be a bad thing now can it? Anywho, this is part two of my quick and easy seafood recipe set. Shrimp are notoriously quick and easy to cook, and make for a great middle of the week dinner when you don't have a lot of time. The problem with most shrimp in general, through, is that they're a little bland with out something else to provide the flavor. Coming from the Chesapeake Bay area, that usually means boiling them in a pot of water and vinegar with a bunch of old bay. There's the cold shrimp cocktail, but that always seems passé. Adding shrimp to pasta or stir fry is quick, but means the shrimp are no longer the star players. So I was happy that while watching Food Network one day, I saw something very similar to this recipe.

I call it cajun shrimp, because I use a good amount of heat and butter, but there's really no provenance beyond that. It is yummy though. Served over a bed of rice and it makes a tidy little meal when combined with a salad.

Cajun shrimp:
1 lb. shrimp
1 stick butter, room temp.
1.5 tsp chili pepper
1 tsp. tabasco
1 tsp. paprika
1 tsp. old bay
  1. Put the butter and spices in a bowl or your food processor and combine thoroughly. This can be made well ahead of time and kept in an airtight container in the fridge. Wash the shrimp and remove the shells, leaving the tails on.
  2. Heat a skillet over medium hight heat and add at least half of the butter. When the butter is completely melted and begins to bubble, add the shrimp and coat thoroughly. Cook for about 5-10 minutes, depending on the size of you pan how tight everything is.
  3. Lay over fresh rice and enjoy with an ice cold beer and some bread (with this amount of heat, you'll need those).


IMG_0903
It looks a bit like chicken doesn't it, but its the seasoned compound butter.

IMG_0905
Shrimp in the pan, before being tossed to coat.

IMG_0906
The end product, all seasoned and buttery.


Those of you who would normally butter your rice obviously need not do so with this recipe. There's more than enough carryover to season the rice with some rich and spicy flavor. As I noted in the recipe, although you have a starch with the rice, you'll probably want some extra bread to help deal with the heat. True, you could use less chili powder and tabasco, but what's the fun in that?

Look for another update some time late next week (possibly next weekend),
Cheers,
Mike

Wednesday, August 5, 2009

Moules Frites (Mussels with French Fries)

The first of a two parter on rather quick and easy seafood dishes:

Moules frites, or mussels with french fries for those who either don't speak French or think its too fancy sounding, is a rather simple dish of mussels in a broth of various concoction with a nice accompaniment of freshly made french fries. The broth has nearly endless possibilities as far as the ingredients go, but the number of ingredients is generally kept to as few as possible. Some form of alcohol (generally white wine) and some aromatics form the base flavor, which you generally want to keep somewhat light so you don't overwhelm the mussels (although for those of you who aren't seafood fans, that may be the whole point). Having said that, I decided to go a bit daring and work up a spicy/lemony curry flavor with some basil, hoping it wouldn't be too strong. I've been growing some lemon balm with the idea of using it in a home made soda at some point, but as I was clipping some leaves off one of my basil plants I thought what the heck and used the lemon balm in place of lemon juice. The result was actually much better than I was expecting, and I just wish I had some bread to mop up some of the broth (the french fries aren't great at that).

Curried Mussels:
2 lb. mussels, cleaned
1 can coconut milk
1 cup white wine (or belgian white beer)
1 tbsp. curry paste (or see below)
handful of basil and lemon balm leaves
  1. Put a large pot over medium high heat and add the curry paste and wine/beer. Mix and bring so a low boil (it shouldn't take longer than 5 minutes).
  2. Let the curry/alcohol mix reduce a little and then add the coconut milk. Bring to a full boil and then add the mussels.
  3. Coat all of the mussels well with the broth and cover for ~5 minutes to get them steamed open. Add the basil and lemon balm leaves and turn the mussels in the broth for another 2-3 minutes.
  4. Transfer the mussels to a bowl and ladle some of the broth over top. Serve with french fries, and preferably a small bowl of broth with some bread for dipping.

French fries:
2 large russet potatoes
big pot of oil
salt for seasoning
  1. Begin heating the oil to 325F. Wash and peel the potatoes and then cut them into ~1/4 inch thick strips. Put the strips into a bowl of water and let sit for 15 minutes. Drain off the starchy water and pat the strips dry.
  2. When the oil is at 325, add small batches of the strips to the pot and cook for about 5 minutes. They should come out pale yellow and become limp when they cool. Repeat until all the strips are done and cool them all to room temperature.
  3. The second frying makes them crispy and delicious, so bump the temperature of the oil to 375F. Again, work in small batches, frying to golden brown. Transfer to a bowl lined with paper towels, sprinkle with salt, and toss. Remove these to a paper towel lines tray and finish off the rest of the batch.


IMG_0895
My home made curry paste, curry powder and sriracha.

IMG_0897
Basil on the left, lemon balm on the right.

IMG_0902
The mussels before being eaten...

IMG_0898
The accompanying fries.


Now, if I wanted to do this traditionally, I'd have made some sort of mayonnaise, but that wouldn't have paired well with the mussels in my opinion, so its been left out. The mussels had a great, subtle flavor from the broth but still tasted like mussels (again, a plus for me, some may disagree). My only regret is that I didn't have some bread to mop up some of the broth, but hey, now we all know.

Stay tuned for part two of my quick and easy seafood dinner series next week (probably Wednesday).
Cheers,
Mike :)

Tuesday, July 21, 2009

What happened to the comment feature?

If you've been asking yourself that question lately, well, guess what, so am I! I just found out a little bit ago that the link to submit a comment no longer appears after each post. Everything is turned on in the settings, and I haven't touched the code in a few months, so I'm pretty flummoxed about why it suddenly went missing. I'm looking into the problem and will hopefully have things fixed as soon as possible!

Comments appear to be fixed now, I guess Blogger had some internal issues. Feel free to comment till your fingers turn blue (actually, please stop before then, I don't want any of my faithful readers to be harmed.)

Cheers,
Mike

Monday, July 20, 2009

Blackberry ice cream

TbF Images - 320


Admit it, that looks so good you want to eat your screen

Ah summer, there's nothing better in the middle of those long hot months than a nice cold bowl of ice cream. Unfortunately, the options available at the local supermarket are often pretty poor. You either get your low end "frozen dairy product" (yes, those $2 per 1/2 gallon tubs aren't actually ice cream according to the feds) or you pay $5 for a small pint of Häagen Dazs. No, you want both the volume and the tastiness, for a rock bottom price, and thats where I come in.

This recipe works off a rather ordinary custard base that I amend as needed to get the final effect. It's pretty utilitarian, so I highly suggest that you get yourself and ice cream maker and not only make this recipe, but also experiment with your own creations. This time I had a couple of packages of blackberries that were on super sale, and trust me, this recipe is good. What makes it spectacular though, is when its melty and you drink down the last bit, ice cream of the gods I tell you. I'm thinking of making a mega-batch solely for making milkshakes.

Blackberry ice cream
9 egg yolks
9 oz. sugar
2 cups heavy cream
2 cups 1/2 & 1/2
18 oz. blackberries
  1. Heat the heavy cream and 1/2 & 1/2 in a pot over medium-low heat till it begins to bubble slightly.
  2. While the dairy is heating, thoroughly whisk the egg yolks and sugar till light in color and you get a steady stream coming off your whisk. Whisking constantly, add ~1/3 of the hot dairy 1 ladle at a time to the yolk and sugar. When the egg yolk mixture is tempered, stream in the rest of the dairy, still whisking and then return to the pot over medium heat.
  3. Stir the mixture continuously until it reaches a temperature of ~175 F. At this point the custard should be thick and not very foamy. Transfer to a container and chill in the fridge overnight.
  4. The next day, put the blackberries and half of the custard in a blender and puree for about 30 seconds. Pour the whole mix into your ice cream maker and process according to the instructions. Pack into containers and harden in your freezer if you can resist eating it all right then.

So, as you can see, its a pretty simple recipe. The base is everything but the blackberries and as I said above, extremely easy to modify to get what you want. It also will keep a good week or more if made in advance and you get it to the proper temperature and keep it in the fridge. Thats a good thing, because I'll buy a 36 ct pallet of eggs and make up a ton of custard base, modifying it in batches to produce a variety of flavors. So, I've given you your canvas, and some purple, now feel free to run with it!

Cheers,
Mike :)

Monday, July 13, 2009

Two drinks you can make yourself...

And for way cheaper than you could buy them for in the store. The drinks I'm talking about in this case are hibiscus agua fresca (fresh water) and soy milk. Its a strange combo to present in the same post, but they're both drinks and I have both ready to post, so I am. I'm also posting these two together because I picked up the primary ingredients for each at the same great farmers market in Delaware. Anyone reading this who lives near it, I highly recommend going.

Anywho, the first drink is hibiscus agua fresca. This drink is rather popular around the world, but primarily found in latin america or Mexican restaurants in the United States. Because hibiscus has tons of Vitamin C and other organic acids, hibiscus agua fresca has a nice tart taste similar to cranberry juice, but a pleasingly smooth tea like after-taste. Much like tea, the ingredients are fairly straightforward, and the process is basically the same with the only change being the steeping time.
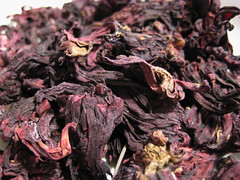
TbF Images - 322
Dried hibiscus flowers, a.k.a. jamaica.


Hibiscus agua fresca:
6 oz. hibiscus flowers (also known as jamaica in many latin markets)
9 cups boiling water
2.5 cups sugar
  1. Add the hibiscus to a large pot or other container, add the boiling water, stir in the sugar, then steep for a good 20 minutes.
  2. After 20 minutes, strain out the flowers and then keep in the fridge. This is essentially a concentrate form, so to serve dilute what you made above 1:2 with cold water.

TbF Images - 339
A nice glass of hibiscus agua fresca.


Man, how easy was that? As I noted above, hibiscus agua fresca has a lovely tart taste similar to cranberry juice, but at ~$9/lb, I can get a few gallons of this compared to maybe a gallon of pure cranberry juice (I don't even bother with cranberry juice "cocktail"). Adjust the sugar content to suit your own tastes, or if you wish to cut down on the amount of sugar you drink simply dilute the concentrate more if that tart-ness is too much for your liking.

The second drink, soy milk, began more as an experiment after seeing soy milk making machines for sale on the internet and not believing that the process could be so complex and time consuming that people would spend ~$150 on a machine that looks like a glorified tea kettle. While soy milk in the store sells for roughly twice to three times the price of a gallon of cows milk for a half-gallon of soy, there area really only two ingredients necessary, and both are dirt cheap in their natural form. The first ingredient is water, which at around 0.3 cent per gallon from your tap (the national average is ~$3/1000 gallons) is about the cheapest thing you can ever buy.

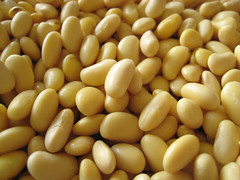
The second ingredient is soy beans, which considering the US produces nearly 1/3 of the worlds supply, should also be pretty cheap. The issue with that last statement, though, is that most soy in the US is grown for animal feed, so if you go looking for soybeans to make soy milk, most likely they've been imported from asia. Still, I got a 4 lb. bag for less than 10 dollars. Most grocery stores I've visited don't sell raw, dried soybeans, so you'll probably need to pick yours up at an ethnic market, possibly at Whole Foods or a health foods market.
TbF Images - 324

Soy milk:
1 lb. dried soybeans (you want the white ones as you can see above)
16 + 2 cups water (1 gallon + 2 cups additional)
  1. The first thing you'll need to do is re-hydrate the beans much like any other dried bean. Soak overnight in ample cool water till they plump up and you can easily bite through one but they're still firm.
  2. Put the gallon of water in a large pot, at least 2 gallon capacity, if you don't have one that big split into two batches. Start heating the water to a boil.
  3. While the water is heating, add 1/2 of the re-hydrated beans to your food processor with enough of the additional water to barely cover the beans. Puree until you get a semi-smooth paste. Transfer to the pot and repeat with the rest of the beans.
  4. You'll notice that the pot will begin to foam as soon as the beans are added, this is natural and will die down as you go through the process. Keep heating the pot over medium high heat for around 20-30 minutes, stirring every few minutes. When the foam mostly dies down and you can see small small bits fibre then you're done.
  5. I do a double strain, pouring from the big pot through a mesh colander into a smaller pot, the pouring that through some cheesecloth into the final vessel. The purpose of the straining is to remove the fibre, known as okara now, from the milk.
TbF Images - 329
Re-hydrated soybeans

TbF Images - 330
Soybean puree

TbF Images - 332
Foamy batch of soy milk

TbF Images - 334
Strained okara, see below for what to do with it.
TbF Images - 338
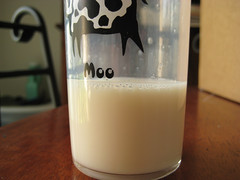
Soy milk in a cow glass


So, it may seem to be a bit of a chore to make your own soy milk this way, but considering that the whole process takes about 45 minutes (not counting the overnight bean re-hydration), I can't see why people justify paying $150 for a machine that will do it for them. I will admit that after tasting my first batch of home made soy milk, and comparing it to commercial soy milk such as Silk, there is a definite taste difference in favor of the commercial brands. The reason is that pure, raw soy milk has a very pronounced grassy flavor that most people will probably object to. Silk and other brands add additional flavors and ingredients to get a taste closer to cows milk. You can achieve the same effect by adding some vanilla and honey if you'd like. The raw form works and tastes good in a smoothie where the fruit will mask the grassy flavor. Either way you'll want to consume/use your soy milk rather quickly as the lack of preservatives will make it go bad with a week.

Now, what to do about all that okara? Well, I'll leave major uses for another post, but you have three primary options: freeze it for later us, dry it in a low oven for later use, or pitch it (preferably in your compost heap or as a soil addition to your garden). Because soy fibre is very nutritious and good for you, I prefer the first two options. As I said, I'll do some posts using it later if you decide to keep yours.

Ok, so not incredibly long, but still fairly decent post. I know it seems like I didn't really sell the soy milk to all of you, but I really would suggest that those of you who buy soy milk regularly give it a try. The hibiscus agua fresca is great for anyone looking for a nice refreshing drink with a bit of tart. So, next time you're in your local ethnic or farmers market, keep an eye out for these two ingredients, or anything else that's a great deal for that matter.

Up next is pina colada ice cream!
Cheers for now, Mike :)

Wednesday, July 8, 2009

Apologies

Ok, so last week I promised a post by mid-week, and it obviously didn't occur. Here's the story, I bought a new computer, but had it shipped to DE so I could see family over the 4th and save on sales tax. Well, it ended up taking forever to transfer all my files and settings and everything else from my old Mac to my new one (I blame the old one). Anywho, I'm still trying to get things sorted and my iPhoto library is currently a mess, but come hell or high water I'll have a post on pina colada ice cream up by this coming Monday!

Monday, June 29, 2009

Pho: rice noodles in beef broth

Ok, so really, this is an imitation pho. Traditional pho is a dish of rice noodles and thinly sliced steak in a beef broth that takes a good 1/2 day to prepare. Kind of kills the whole mythos of asian cuisine as being fast (don't worry, its still fairly cheap!). Ordering it from a take-away restaurant is an option, but you'll pay more than if you made it at home and you know you'll only be tempted to order some egg rolls or other unhealthy "sides" to go with it. The solution, of course, is to make your own pho at home, and cheat a little in the process.

As I just alluded to above, the beef broth for pho is normally a home-made stock, traditionally using oxtails as the base (you may have noticed that I switched terms there. I define stock as a liquid made from the meat and bones of an animal, and broth as any flavored liquid that accompanies other additions. So in this case, the end result is a broth that's made using stock. Its a little odd, I know.). I'm not ashamed to admit that in this case, I cheated and used a packaged beef stock. Kitchen Basics Unsalted Beef Stock to be precise. Why did I go with that brand and type? Simple, I wanted a base that I could easily and quickly work off of, and unsalted beef stock is about as plain vanilla as you can get after water. It also means you can do small batches of pho quickly and easily because of the nifty re-sealable packages.

The basic idea here is to prepare the noodles and assorted additions (more on this later) while heating up the broth, then combine them all in a bowl. Since I already said unsalted beef stock is pretty plain, you'll need to make some additions of some veggies and spices while heating it up to get a good and rich broth. I used some "fancy" mushrooms, as the local supermarket calls them (wood-ear, enoki, shitake, really not that fancy), but you can use "normal" mushrooms. Combine them mushrooms with some chili paste and sliced onion, heat them thoroughly, then add in some steak and the stock. By the time it comes to a boil (which you'll want it to) the flavors will have been beefed up (an unintended pun, ha ha...) sufficiently. Its really quite simple and takes about a half hour.

Pho: rice noodle and beef broth soup
1 container unsalted beef stock
4 oz. flank steak (or similar quality beef)
6 oz. mushrooms, sliced into small pieces
1/4 onion, finely sliced
salt as desired
1 tbsp. chili paste
1-2 tsp. olive oil
1/4 lb. rice noodles
additional stuff such as bean sprouts, basil, cilantro, sliced jalapenos
  1. In a large enough pot over medium heat, add the oil and chili paste. When the oil is hot enough, add the onions and mushrooms. Cook until the onions are translucent and the mushrooms have given back the moisture they absorbed when first added.
  2. Salt the steak liberally and let sit for ~5 minutes (this seems odd but its the only time salt is added so don't be shy). After the 5 minutes, slice the steak thinly and add to the pot along with the stock. Turn the heat up to high and bring to a boil.
  3. While the broth is coming to a boil, soak the rice noodles in cold water for ~15 minutes. Bring another pot of water to a boil and add the noodles and cook for 3-5 minutes maximum (over cooking will turn the noodles into a gummy mess).
  4. Drain the noodles and add to the bottom of a bowl. Add whatever additions you'd like and fill up with the boiling hot broth, making sure to get some mushrooms, onion, and steak in as well. Serve with a wedge of lime and some hot sauce (Sriracha work best in my opinion).


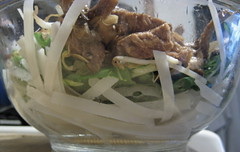
TbF Images - 315
Noodles on bottom, with chard, bean sprouts, steak, and mushrooms piled on top before adding the broth.


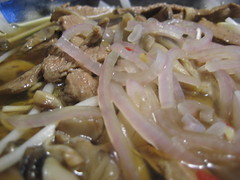
TbF Images - 316


As you can tell, this is a pretty simple dish, and pretty easy and quick to make if you cheat like I did. The salting of the steak before adding it to the pot may seem odd to many, but there's a very good reason for doing it that way. The first is that directly salting the meat will help break down the fibres in lower quality cuts, making them more tender in the end. The second reason is it pulls some of the juices out of the meat, and brings the salt in. This gives the meat itself some more flavor that you'd lose because of the short cooking time (if you salted the broth directly, the meat would loose a lot of flavor).

Now, as I noted, you can use all sorts of "additions" to your pho. The traditional ones are basil, cilantro, bean sprouts, sliced chilis, and a lime wedge. For the picture above, you can see (well, more read) that I used some chard from my garden. I just tore it into small pieces and added it directly to the bowl before adding the hot broth. Similar substitutions are more than accepted. The only thing you'll want to make note of is that you don't want to add a lot of cold/room temp. ingredients as it will cool the soup down too quickly (rice noodles get cold fast). Aside from that, feel free to experiment with what you have on hand. I'm pretty sure I'll be forced to add some zucchini in a few months.

So, I'm a day later than I hoped for, but I will promise a post in the next few days again. Cheers for now,
Mike

Monday, June 22, 2009

Blackened fish sandwiches

Ok, so firstly, I apologize for not posting sooner. One of the problems with being an ambitious cook is that often I'll get too ambitious for my own good. So, in the past three weeks I've learned that I'm really bad at trying to make donuts, that "elaborate" sugar crafting is best left to professionals/those with proper kitchen space, and that chili oil turns very quickly into home made tear gas if used inappropriately. Oh well, live and learn. I'm still waiting on my beer to get to its final stages so I can bottle it and do a full write-up on that, so I decided that I should go for something relatively easy that I knew I wouldn't burn my house down attempting.

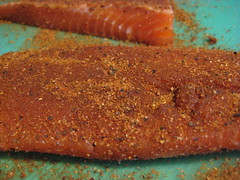
Its no secret that I like seafood, so every time I go to the supermarket I swing by the fresh fish case and see what's on sale and if there's anything good on managers special. This past week I found two whole fillets of steelhead trout (the ocean caught form of rainbow trout) for $5 on special, so I picked them up with some nice ciabatta rolls and went home planning out a fish sandwich in my head. I didn't want to fry it, but I did want the fish to be a little crispy without being dried out. Some spice would be a nice touch too since trout is a little bland for a red fleshed fish (in my opinion at least). I settled on making the classic blackened fish and serving it with a nice and spicy mayo on the ciabatta rolls.

Blackening spice can be many things, but generally is based off a combination of paprika (which burns easily) and other spices that will form a dark(burnt) crust on the outside of a piece of meat (generally fish but also chicken, occasionally beef). As with anything, you can buy it pre-made, but you're really better off making it yourself from what you have in your spice rack. A decent base "recipe" is below, but feel free to experiment. Depending on what meat you have on hand, you may want to add more or less of certain spices to augment or accent what you have.

Blackened fish sandwiches:

2 tbsp. paprika
1 tsp. black pepper
1/2 tsp. onion powder
1/2 tsp. garlic powder
1/2 tsp. cayenne pepper
2 fish fillets (abt. 3 inches wide)
2 rolls of your choice
cheese slices, cheddar is a good choice
assorted greens, onion, pickles, cheese for dressing
1/4 cup mayo (store bought or home made)
2 tsp. chipotle tabasco (feel free to use less)
1 tbsp. dill weed
2 tbsp. butter
  1. Combine the paprika, black and red peppers, and onion and garlic powders in a jar or small dish and mix thoroughly.
  2. Pat the fish or other meat dry and rub liberally with the spice mix to coat. Put a skillet (preferably cast iron) over high heat and add the butter.
  3. Just as the butter begins to burn, add the filets and cook on each side for roughly 1-2 minutes per side (fish is quick, chicken will take longer, don't give yourself food poisoning...). Remove from the pan and set on some paper towels to remove some of the excess fat.
  4. Mix the mayo with the chipotle tabasco and dill weed and spread some on each side of the roll/bun. Add the cheese, some greens and onion (I added some pickles to cool it down more since I used more cayenne) and lay the fish on top.
  5. Enjoy with some chips and a nice cold beer.


    Library - 1038
    The trout, liberally seasond, before meeting the hot pan.

    Library - 1039
    The fish after the pan. Note the nice black crust on top.


    Now, for some people, thats a rather light blackened fish, and I'll admit that that's a somewhat true assessment. Traditionally you would want your pan raging hot over full heat and use pre-melted butter as lubricant. Not wanting to risk full fledged firey chaos, I toned the temperature down some. You don't get the sides as dark, as you can tell, but you avoid having to meet your local fire crew on less than ideal terms (although I'm sure they're great).

    One issue some people may have to this recipe is the natural aversion to eating burnt things. Over cooked burgers, failed Thanksgiving turkeys, pies forgotten in the oven, the record of "burnt" food is pretty poor. The beauty of blackened foods, though, is that the spices were purposely chosen for their low burning temperatures. Combined with the milk solids present in the butter (which is why butter is used to do this), you end up getting a burnt crust that actually protects the meat from drying out and burning itself. The result is a juicy, fully cooked inside, with a crispy spicy outside.

    Ok, so there's a recipe. I've got some less outlandish ones in the pipeline now that I pretty much know will work, and my beer should hopefully be done in another week or so, so look out for that one.

    Cheers,
    Mike

Monday, June 1, 2009

Salmon Burgers

Having been born and raised on the east coast, seafood was a normal part of my diet. I can remember quite fondly going to Long Island to see my grandparents, going out to some restaurant that may or may not exist any more, and surprising my grandfather as I ate all sorts of assorted sea creatures with nary a thought. At family gatherings, if there was a fish on the menu, it was usually on my plate. I'm fairly certain that out of nearly 30 some odd dinners on cruises, I had seafood as my main course for at least 25 of them. Mako shark, swordfish, whitefish, red fish, squid, octopi, clams, mussles, oysters, shrimp, crabs, lobster, frogs (not technically seafood but aquatic none the less) I've eaten and enjoyed them all (some more than others depending on how they were cooked).

So, imagine my sense of awe when 5 years ago I went to visit Oregon State University in Corvallis, and discovered the salmon burger. All I could say was "where have you been all my life!?!" Thankfully, with the rise of Trader Joes, Whole Foods, and even the organic section of your local grocer, these tasty treats are available nearly every now. Unfortunately, I'm still a grad student on a budget, and paying $6 for 4 burger is a little steep. So channelling all of the culinary MacGyver vibes I could, I set out this weekend to make my own.

TbF Images - 309


It may not be the prettiest girl at the ball, but I wouldn't have any other. (Ok, I'd never pass on a store bought one, but thats not the point here). They're rather like making normal hamburgers from ground beef, only different. Since beef has lots of fat, its normally pretty sticky. Salmon is much much leaner, so you'll actually need to add some fat in to help bind things together. Don't worry though, as opposed to the saturated fats in beef, we're going to stick to relatively healthy olive oil. Combine that with the health benefits salmon normally brings to the table, and I think salmon burgers should be looked at as the new replacement for the hamburger. Or not...

Salmon Burgers:
1/2 pound chunk salmon, de-boned and de-skinned
1/4 cup red onion, finely diced
1/4 cup prepared mustard (coarse grain or dijon is best)
2 tbsp. ketchup*
2 tsp. prepared horseradish*
2 tbsp. olive oil
1/4 cup panko bread crumbs
1 tbsp. mustard powder
2 tsp. dill weed
1 tsp. celery seed
1 tsp. salt
1 tsp. ground pepper

*You can use cocktail sauce instead of the ketchup and horseradish if you prefer
  1. Shred salmon into fine pieces with a fork, or pulse quickly in a food processor.
  2. Add the onion and spices and combine thoroughly. Its easier to get all of the salmon integrated with the spices now than after adding the wet works.
  3. Add the wet ingredients, mixing thoroughly. Work the panko in with your fingers to distribute.
  4. Using your hands, grab a bit of the salmon mix just bigger than a golf ball and form into a pattie in your hands. Place on a square of parchment or wax paper, lay another square on top, and continue till you've used up all the mix. Freeze all of the patties you don't plan on using right then.
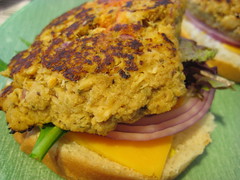
  5. To cook, heat a griddle pan over medium heat and lightly spray with no-stick spray. When the pan is hot, add the pattie and let cook for about 2-3 minutes a side. Salmon, being a lot lighter than beef, cooks much quicker and you don't want to cook it to the point of drying out. Serve on a bun with a little lettuce, an onion slice, some cheddar, and either some mustard or cocktail sauce (or both!).


TbF Images - 305
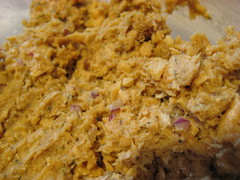
Ok, it does look a bit like cat food, but then again, ground beef doesn't look that appetizing when sitting raw in a bowl either.


TbF Images - 308
Fresh off the griddle, prior to being crowned and consumed.


While these may never replace that memory of the first time boy met salmon burger, for being a lot less than 50 cents a piece, I'm perfectly happy with how these babies turned out. And with the money I'm now saving by not buying salmon burgers from Whole Foods, I can afford to make a new beer! Yup, you heard me right, I'm making a new beer, and this time its not from a kit, so be prepared for some home brewing related posts coming up soon.

Cheers,
Mike

Sunday, May 17, 2009

Tabbouleh

So, my last couple of posts have mostly centered around generally unhealthy foods (potato chips, ice creams, tempura, mac & cheese, etc.). And while all those foods are great, they are generally lacking when it comes to the type of balanced nutrition that active people really need to keep themselves going. Fortunately, the focus of this post is on an incredibly healthy and extremely tasty dish from the middle east that also happens to be rather popular in some South American countries as well. Its tabbouleh!

Tabbouleh is made with an odd form of wheat, bulgur, thats been parboiled, dried, and packaged. The parboiling means that it cooks quickly later and since its a whole grain it packs a nutritional wallop, so its super quick and healthy. Along with the bulgur, tabbouleh combines massive amounts of parsley, some mint, some tomatoes, green onion, spices, and a very light splash of olive oil and lemon juice. Since I pretty much just gave you the ingredients, I'm going to do the method mostly in pictures.

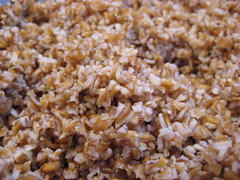
Step 1: Add 2 cups of water to 2 cups of bulgur wheat. Let the bulgur soak up all the liquid, it will take about an hour.
TbF Images - 282


Step 2: While the bulgur is doing its thing, chop up two firm tomatoes finely, almost as fine as like making salsa.
TbF Images - 279


Step 3: Throw a whole bunch (literally, one whole bunch from the supermarket) of parsley and a small handful of mint leaves into your food processor and pulse till finely chopped.
TbF Images - 280


Step 4: Slice up 4 or 5 green onions.
TbF Images - 281


Step 5: Combine all of the above and 1/2 tsp. sea salt, 1/2 tsp. freshly ground pepper, and 1/2 tsp. cumin. Let sit refrigerated for an hour to get the flavors mingling.
TbF Images - 283


Step 6: Add 1/4 cup olive oil and 1/4 cup lemon juice, mix thoroughly, and either serve straight away or keep in the fridge for up to a week. I eat my tabbouled like a dip with some pita flatbread that you'd use for an gyro, but the traditional method is in a lettuce leaf. Either way its darn good.
TbF Images - 287


You may notice that after the bulgur has soaked up all the original liquid, its still a little hard. Don't worry, after you mix everything else in and let it sit, it will come out nice and chewy in the end. Aside from having a high amount of fibre, there's a decent amount of iron and other minerals which makes tabbouleh a great way to even out the deficiencies of the rest of your diet. It may not take the place of a full meal, but it would make a wonderful afternoon snack or accompaniment to a sandwich for lunch. Really, no matter where you include tabbouleh in your diet, you can't really loose.

Cheers, Mike

Sunday, May 10, 2009

Chips, Kettle-esque

Potato chips have become something of an oddity lately. Mass marketed for decades as an increasingly inferior and unhealthy snack food, they've recently moved upscale with the advent of small batch "boutique" brands using different cooking methods, oils, and potatoes. In the end though, they're still the same thinly sliced fried potato product originally developed back in 1853. What's the real shame with current mass market potato chips though is that no matter how hard you try, you'll never get a bag that tastes as fresh as when they're straight from the fryer. So I'm here to help everyone experience that little bit of joy.

Home Made Potato Chips:
2 qts. frying oil
4 large russet potatoes (cleaned and dried)
salt or other seasonings
  1. Slice the potatoes as thin as you can get them with a large, sharp knife, or to the thickness of a dime if using a mandolin. Spread the slices out onto some paper towels and heat the oil to 350F.
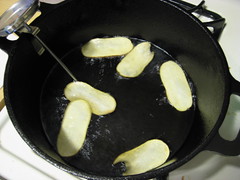
  2. When the oil is at the right temperature, add 8 or so slices at a time and keep them moving with a fine mesh strainer. It will take about 3-5 minutes for them to turn nice and golden brown. At that point transfer the chips to a bowl lined with some paper towels and toss to remove excess oil. Sprinkle in your seasoning and then transfer to some paper towels on a counter.


TbF Images - 273
Potato slices before frying.

TbF Images - 271
Frying up long cut slices, they carry more seasoning.

TbF Images - 274
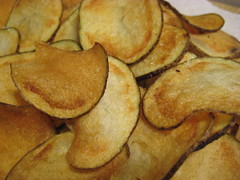
Freshly fried chips, lightly seasoned with sea salt, seconds before being consumed.


As I said in previous posts, once I've got my dutch oven filled with oil, I know I have another 3-4 fry sessions left before the oil should be discarded (or turned into biodiesel, but thats not my area). Since its a pain to filter and store it in between these runs, I enjoy finding excuses to fry things since it's not one of my standard cooking methods. These chips went perfect with the hotdogs and cole slaw I had for dinner earlier this week. Unfortunately for my taste buds, but fortunately for my waistline, this was the final session with this oil, so I doubt I'll be deep frying anything else for a little while. But that means more variety of recipes for you guys, so there's some good that comes out of it.

Cheers, Mike

Sunday, May 3, 2009

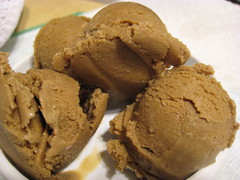
Coffee ice cream

Who says you can't have ice cream for breakfast? Since bacon and eggs ice cream doesn't sound too appealing (although it has been done and I've never actually tried it) I think I'll stick with coffee ice cream for now (full disclosure, this past week my breakfast consisted of raspberry acai sorbet, but thats healthy because it has fruit... right?). Now, most coffee ice cream recipes I've seen say something along the lines of make your standard vanilla ice cream custard base, then add some espresso powder or instant coffee before you pour the mix into your ice cream makers. I thinks that's simply cheating... coffee ice cream should have coffee as its main ingredient and not an afterthought! The problem, though, is that coffee as you drink it is really just water, and adding coffee grounds to an ice cream base would result in a grainy, disgusting disappointment.

This is where a little science comes into play. You see, when you brew coffee normally, you're using heat as part of the mechanism for extracting all of the lovely flavors and aroma's that you expect from a normal cup of coffee. The reason isn't so much because heat is the best method for doing so, its simply because we don't feel like waiting. Heck, espresso was invented simply as a method for making coffee even faster than it already took. But if we have some time on our hands, we can achieve the same results without heat. And without relying on heat, we no longer need to stick to water as our sole extraction liquid. Now, you may be thinking that I'm suggesting alcohol, and you can extract flavors this way, which is how vanilla, mint, nut, and numerous other flavorings are extracted. But I figured why add more ingredients than necessary, infuse the milk!

Thats right, I directly infused the coffee into the milk before making the custard base. Its similar to cold brewing coffee but takes twice as long and obviously needs to be done in the fridge. Using whole milk over half and half sacrifices some of the richness that you lose from having less fat, but makes filtering later much easier and quicker. As far as purity goes, its hard to beat a recipe that has only 5 ingredients.

Coffee Ice Cream:
2 qts. whole milk
2 cups coarsely ground coffee
6 egg yolks
2 cups sugar
1 good pinch salt
  1. Add the coffee grounds to the milk in a big enough container (a 1/2 full gallon jug of milk works best) and place in your fridge for at least two days, giving it a shake every few hours if possible. After the infusion period (mine was 4 days simply because it was, 2 days works just as well) strain the milk through a coffee filter into a receiving container and then transfer to a large sauce pan over medium-low heat.
  2. Add the egg yolks, sugar, and salt in a heat proof work bowl and whisk until creamy. Add 1 cup of the warm milk slowly to the eggs while constantly whisking to temper. Add one more cup of warmed milk, whisking till thoroughly combined and then pour the whole mix back into the sauce pan.
  3. Heat over medium-low heat until the mixture gets thick enough that it will coat the back of a spoon and drawing your finger through it will leave a clean area. This is the standard custard method for ice cream bases so learn to recognize this point. When thickened, pour the custard through a fine mesh strainer into a large enough container and chill in your fridge for a few hours.
  4. Pour the chilled custard mixture into your ice cream maker and let it go for about an hour or follow the manufacturers instructions. Pack into containers and put in your freezer to harden.

TbF Images - 269
Whisking the eggs and sugar before adding the heated milk to temper. Be careful to slowly add the heated milk so you don't make scrambled eggs!

TbF Images - 279
Small scoops may disappoint some, but see below for my ultimate serving suggestion.


So, there we go, coffee ice cream without resorting to espresso powder or instant coffee. The direct infusion of the milk method works for other flavors as well, but thats another post now isn't it. As I said above, this is the perfect excuse for any coffee drinker to have ice cream for breakfast, but what about those who just can't get the day started without a stop at Starbucks? Here's my advice: get a small coffee cup (or a large one if you really wish) and fill it with small scoops of coffee ice cream. Drizzle caramel syrup and hot fudge on top, then add some chopped walnuts and a dollop of whipped cream. Voila, turtle mocha sundae! Now thats a cure for a case of the Mondays.

I've got a whole back-log of ice cream recipes now, but I'll try to space them out with some other tasty items.

Cheers, Mike.

Wednesday, April 29, 2009

Tempura: tasty fried things

So, I know I promised this over the weekend, but Saturday was too nice to stay indoors so I worked on getting my garden ready for full planting, did some misc. outside housework, and went for a good long bike ride. Sunday I was unfortunately in my lab all day and didn't have the desire to write a blog post afterwards. I don't even want to get into the past two days.... But this is a sort of double recipe post to make up for all that!

Anywho, two weeks ago, while everyone was busy planning for an upcoming conference that the bulk of the lab went to, we all accidentally forgot one of my lab-mates' birthday. After finding that out, we organized an impromptu trip to his favorite Korean restaurant (he's Korean, so you know it was authentic and good). I ordered the tempura lunch box (essentially a bento box) as something different from my usual. Since then I've been wanting more, but haven't had the time or money to go to lunch and order it. Time to dig out the dutch oven and frying oil!

Tempura is simply a method of lightly frying pretty much anything. Its not dense like many fried foods in America, and it often consists only of vegetables and shrimp. Its light, puffy, and you don't feel loaded down after eating a couple of pieces. The key to all of that is the batter. Tempura batter is made quickly using a low gluten flour (sorry, no whole wheat tempura) and kept cold. This lack of gluten causes the batter to puff when fried, not become chewy and dense. Served with traditional dipping sauce (you can find it bottled in your local asian market) and its near heaven (if you're on a tempura bender like I was last week).

Tempura shrimp and vegetables:
1.5 cups flour (preferably pastry, but AP will do)
1 tsp. salt
1 tsp. baking powder
1 cup ice water
3-4 ice cubes
1 egg
stuff to fry (see tips below)
2 quarts oil for frying
  1. Divide the flour, adding 1/2 cup to a shallow bowl (for coating the pieces before dipping) and the rest to a mixing bowl. Add the salt to the coating flour and mix with a fork to combine. Add the baking powder to the mixing bowl and mix. Start heating the oil to 375F in a dutch oven or fryer.
  2. Coat the food pieces to be fried lightly with the coating mixture and set on some paper towels. This and the salt will remove some of the moisture from the pieces which will help them fry better.
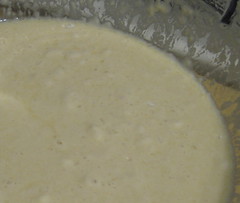
  3. After everything is coated, quickly wisk the egg with the ice water and add that and the ice cubes to the mixing bowl. Mix for only a few seconds. Your batter should be lumpy as in the picture below.
  4. When the oil is at the right temp. dip the pieces, shake off some excess batter and carefully add to the fryer. Like most fry jobs, they'll sink first and float to the top as they cook. Depending on the size of the piece and what it was (raw seafood vs. vegetable) you'll need to time it accordingly, just remember that if the sizzling stops, then you've gone too far and oil is going in instead of water(steam) coming out. Remove finished pieces to a cooling rack laying on top of paper towels and then serve asap or keep warm in a 100F (toaster)oven.


Tips:
Shrimp will tend to curl when cooked, so skewer them before dipping in the batter. Save anything raw like the shrimp for frying last as well so you don't have any cross contamination issues. Slice your veggies thinly (or fruits, you can do bananas from what I've read) so they cook quickly and don't get mushy. Your batter may separate a little, just give it one or two quick stirs to pull back together. Use a fine meshed strainer to remove all of the little bits of batter that come off so they don't burn and cause nasty flavors. After your fry session, pour the oil back into the original container through a coffee filter to remove any small bits you don't want staying around. The oil should be good for 3-4 more uses, just don't try using it in cakes.

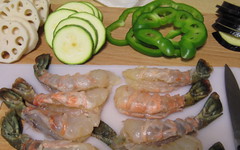
TbF Images - 258
What I used, lotus root, zucchini, bell pepper, eggplant, and shrimp.


TbF Images - 259
See how the batter is lumpy, thats what you want. Keep it cold!

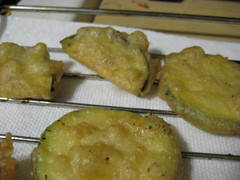
TbF Images - 261
Tempura eggplant and zucchini, notice how the batter is thin and puffy?


So, restaurant tempura will probably always trump my own, simply because it's a bit of a hassle (deep frying is always a chore at home). But for those times when I really feel like I can't live without tempura for dinner, I have my own method that works pretty darn well. I'm also excited because I've got a recipe in mind for using up the extra lotus root and eggplant that I didn't use, so look forward to that assuming all goes well.


Ok, so I promised a second recipe, and here it is... although I'll admit it's barely a recipe.

Rasberry Acai sorbet:
2 33 oz. bottles Tropicana Pure rasberry acai juice
2 cups sugar
1 cup water
  1. Add the sugar and water to a saucepan and bring to a boil. Boil for 5 minutes and then cut the heat and cool. You've just made standard simple syrup!
  2. Combine the simple syrup and juice in your ice cream maker and let it go.
  3. Enjoy the awesome deliciousness that you've just created, or pack it into a container and freeze to harden.


Told you it was barely a recipe. But I got two bottles of the juice on managers special for a grand total of $5, the sugar probably cost me 50 cents, and I came out in the end with a half gallon of sorbet that if you bought pre-made would cost a lot more and have a lot more "stuff" in it. So those of you who don't have an ice cream maker yet.. GET ONE! Because I've got a bunch more ice cream recipes in the pipeline and you'll only feel sad if you can't make them yourself.

Tuesday, April 21, 2009

Mac & Cheese, finally...

Ok, so as I noted in my last post, I had originally intended to post this recipe last Monday. But now I am. So yay for a recipe and not an essay! Anywho, this recipe really started as a mistake. I had bought some steak on mangers special that I was cooking up to make a cheesesteak, but when I looked in my fridge I saw I didn't have any Cheese-Wiz left. (Side note, the true Philly was to do a cheesesteak is with the Wiz.) So, having a big block of cheddar and a basic knowledge of french sauce making, I set out to make a Wiz replacement. That failed miserably (too thin), so I put it in a container and froze it till I could think of what to do. (Another side note, I was forced to use straight cheddar for my cheesesteak, boo...) Eventually, I figured out that if I bought some macaroni, I could probably use my cheese sauce as part of a mac and cheese. So how did it turn out? Considering that it started as a mistake, pretty darn well. I'd probably switch straight cheddar with a mix of cheeses, but I would make it again as given below any time.

Mac and Cheese
1 lb macaroni
2 cup pankos bread crumbs, divided
4 roma tomatoes, sliced
3 tbsp. butter
2 tbsp. flour
1.5 cups milk
1 lb sharp cheddar cheese, grated
1/4 tsp. salt (the cheese carries a lot with it, so you don't need much more)
1 tsp. pepper
1 tbsp. chili powder
2 tsp. mustard powder
1 tsp. coriander
  1. Heat your oven to 350F. Cook the macaroni till just cooked, drain, reserving 1/4 cup of the liquid with the pasta to keep it from drying out.
  2. Put the butter in a saucepan over medium heat. When completely melted, add the flour and stir continuously till slightly browned. Slowly add in the milk and stir till lump free. Add most of the cheese in multiple batches, stirring till creamy (reserve some cheese to sprinkle on the top before baking). Add the spices and remove from heat.
  3. Mix the macaroni, panko, and cheese sauce in a 9x13 baking pan. Add the tomatoes to the top and sprinkle on the remaining panko and cheese.
  4. Bake till the cheese and panko topping is nice and brown, ~30-45 minutes (I didn't time it, my apologies)


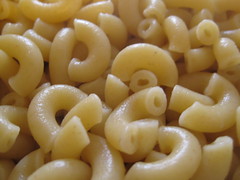
TbF Images - 215
Whole grain macaroni


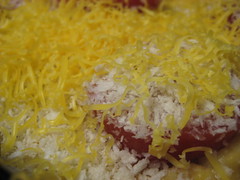
TbF Images - 219
Pre-Oven shot


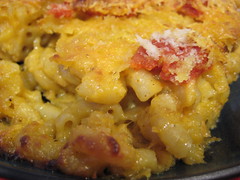
TbF Images - 227
Post-oven shot


This recipe keep and re-heats pretty well. The cheese I used, however, was more oily than what proper cheese should be, so subsequent meals were a little greasy after visiting the microwave. As I said above, replacing the cheddar with a mix of other cheeses, such as some fontina, gruyere, jarlsberg, etc. would give a different, possibly spectacular results. But since I was able to turn a mistake into pretty good, I'll take it.

I'll be back with another recipe this weekend, so stay tuned!