And for way cheaper than you could buy them for in the store. The drinks I'm talking about in this case are hibiscus agua fresca (fresh water) and soy milk. Its a strange combo to present in the same post, but they're both drinks and I have both ready to post, so I am. I'm also posting these two together because I picked up the primary ingredients for each at the same great
farmers market in Delaware. Anyone reading this who lives near it, I highly recommend going.
Anywho, the first drink is hibiscus agua fresca. This drink is rather popular around the world, but primarily found in latin america or Mexican restaurants in the United States. Because hibiscus has tons of Vitamin C and other organic acids, hibiscus agua fresca has a nice tart taste similar to cranberry juice, but a pleasingly smooth tea like after-taste. Much like tea, the ingredients are fairly straightforward, and the process is basically the same with the only change being the steeping time.

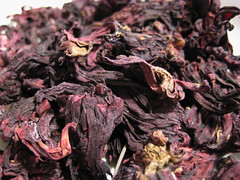
Dried hibiscus flowers, a.k.a. jamaica.
6 oz. hibiscus flowers (also known as jamaica in many latin markets)
9 cups boiling water
2.5 cups sugar
- Add the hibiscus to a large pot or other container, add the boiling water, stir in the sugar, then steep for a good 20 minutes.
- After 20 minutes, strain out the flowers and then keep in the fridge. This is essentially a concentrate form, so to serve dilute what you made above 1:2 with cold water.

A nice glass of hibiscus agua fresca.
Man, how easy was that? As I noted above, hibiscus agua fresca has a lovely tart taste similar to cranberry juice, but at ~$9/lb, I can get a few gallons of this compared to maybe a gallon of pure cranberry juice (I don't even bother with cranberry juice "cocktail"). Adjust the sugar content to suit your own tastes, or if you wish to cut down on the amount of sugar you drink simply dilute the concentrate more if that tart-ness is too much for your liking.
The second drink, soy milk, began more as an experiment after seeing soy milk making machines for sale on the internet and not believing that the process could be so complex and time consuming that people would spend ~$150 on a machine that looks like a glorified tea kettle. While soy milk in the store sells for roughly twice to three times the price of a gallon of cows milk for a half-gallon of soy, there area really only two ingredients necessary, and both are dirt cheap in their natural form. The first ingredient is water, which at around 0.3 cent per gallon from your tap (the national average is ~$3/1000 gallons) is about the cheapest thing you can ever buy.
The second ingredient is soy beans, which considering the US produces nearly 1/3 of the worlds supply, should also be pretty cheap. The issue with that last statement, though, is that most soy in the US is grown for animal feed, so if you go looking for soybeans to make soy milk, most likely they've been imported from asia. Still, I got a 4 lb. bag for less than 10 dollars. Most grocery stores I've visited don't sell raw, dried soybeans, so you'll probably need to pick yours up at an ethnic market, possibly at Whole Foods or a health foods market.
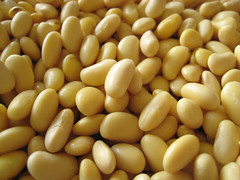
Soy milk:1 lb. dried soybeans (you want the white ones as you can see above)
16 + 2 cups water (1 gallon + 2 cups additional)
- The first thing you'll need to do is re-hydrate the beans much like any other dried bean. Soak overnight in ample cool water till they plump up and you can easily bite through one but they're still firm.
- Put the gallon of water in a large pot, at least 2 gallon capacity, if you don't have one that big split into two batches. Start heating the water to a boil.
- While the water is heating, add 1/2 of the re-hydrated beans to your food processor with enough of the additional water to barely cover the beans. Puree until you get a semi-smooth paste. Transfer to the pot and repeat with the rest of the beans.
- You'll notice that the pot will begin to foam as soon as the beans are added, this is natural and will die down as you go through the process. Keep heating the pot over medium high heat for around 20-30 minutes, stirring every few minutes. When the foam mostly dies down and you can see small small bits fibre then you're done.
- I do a double strain, pouring from the big pot through a mesh colander into a smaller pot, the pouring that through some cheesecloth into the final vessel. The purpose of the straining is to remove the fibre, known as okara now, from the milk.

Re-hydrated soybeans

Soybean puree

Foamy batch of soy milk

Strained okara, see below for what to do with it.

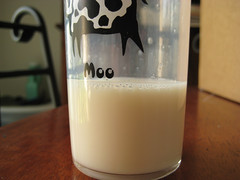
Soy milk in a cow glass
So, it may seem to be a bit of a chore to make your own soy milk this way, but considering that the whole process takes about 45 minutes (not counting the overnight bean re-hydration), I can't see why people justify paying $150 for a machine that will do it for them. I will admit that after tasting my first batch of home made soy milk, and comparing it to commercial soy milk such as Silk, there is a definite taste difference in favor of the commercial brands. The reason is that pure, raw soy milk has a very pronounced grassy flavor that most people will probably object to. Silk and other brands add additional flavors and ingredients to get a taste closer to cows milk. You can achieve the same effect by adding some vanilla and honey if you'd like. The raw form works and tastes good in a smoothie where the fruit will mask the grassy flavor. Either way you'll want to consume/use your soy milk rather quickly as the lack of preservatives will make it go bad with a week.
Now, what to do about all that okara? Well, I'll leave major uses for another post, but you have three primary options: freeze it for later us, dry it in a low oven for later use, or pitch it (preferably in your compost heap or as a soil addition to your garden). Because soy fibre is very nutritious and good for you, I prefer the first two options. As I said, I'll do some posts using it later if you decide to keep yours.
Ok, so not incredibly long, but still fairly decent post. I know it seems like I didn't really sell the soy milk to all of you, but I really would suggest that those of you who buy soy milk regularly give it a try. The hibiscus agua fresca is great for anyone looking for a nice refreshing drink with a bit of tart. So, next time you're in your local ethnic or farmers market, keep an eye out for these two ingredients, or anything else that's a great deal for that matter.
Up next is pina colada ice cream!
Cheers for now, Mike :)

