Monday, March 15, 2010

Orange Black Sesame "Vegan" Cake

Ok, so I really apologize on this one... I meant to get this posted 2 weeks ago when I originally made this tasty treat, but since I was making it for a friend who was graduating, I completely forgot to take pictures at home before brining it in to work. I planned to remake it, but then decided that tearing apart most of my kitchen because I was tired of the dark brown cabinets was a better idea. So, you'll have to unfortunately accept the lower quality pictures that I took with my phone as people were grabbing pieces of cake.

Now that that's done, lets get on with it shall we? Now, firstly, don't let the term "vegan" in the title throw you off. This cake is delicious. I originally found out about this method from the LA Times which did a post on "Crazy Cakes". According to the article (here), these are cakes that came about during WWII when eggs and butter became rationed and home cooks needed to improvise. Also, because they're made without eggs or butter they remain parve and thus be consumed after a meat meal in line with kosher dietary restrictions. So, because the cake is leavened using baking soda/powder and vinegar/lemon juice, it still rises to be nice and airy, although admittedly chewier than a traditional cake. Another reason for that chewiness is the use of part all purpose and part bread flour. The bread flour helps add protein to form gluten which better traps the carbon dioxide that makes the cake rise. Normally, this role is taken by the butter and eggs being creamed with the sugar, but we have neither of those here.

The other great secret about this cake is that it's ridiculously easy to prepare. It requires about 5 minutes of prep time total (maybe 10 if you want to really take your time with it). Everything gets mixed in the same dish you bake it in, so clean up is a breeze too. Overall, I can't find any fault with this cake, except that it's perhaps too convenient and thus may not help out you or your co-workers waistlines when you keep bringing one in.

Orange Black Sesame Crazy Cake
2 cups AP flour
1 cup bread flour
2 cup sugar
1 tbsp baking powder
1/4 cup black sesame seeds
zest of 1 orange
1.5 tbsp fresh orange juice
1 tbsp cider vinegar
1/4 cup vegetable or canola oil
1 tsp sesame oil
1 cup hot water
  1. Heat oven to 350°F. Combine all dry ingredients including orange zest in a 9x9 in. glass baking dish. Sift together with a fork or whisk to distribute well. Form 3 depressions, one big and two small. Pour the vinegar into one small depression, the orange juice into the other, and the oils into the large depression.
  2. Stand back and admire the smiley face you undoubtedly just made.
  3. Pour the hot water over the entire pan. Mix with a silicone spatula until everything is smooth. Bake in the oven for 30 minutes.
  4. When a toothpick comes out clean, remove from the oven and cool for an hour. At this point you can either serve as is or spritz the top with some triple sec to add a little zing.


IMG_0220


IMG_0221
Just look at that crumb, pretty good lookin' huh.


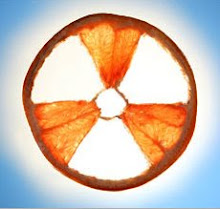
Well, sorry the pictures aren't as high quality as I'd like. The orange color came out much more muted that reality. The cake, however, was and is as good as I promise. I'll try and remember to take proper pictures before sending my next concoction into work. As a future note, I recently got a new ice cream maker, one of the Cuisinart models that has the freezable bowl. So now I can make ice creams and other frozen treats without having to plan on getting a ton of crushed ice from my lab, so be on the lookout.

Cheers for now,
Mike :)

Thursday, February 18, 2010

Carrot and Celeriac Soup

Ok, so this snow and ice and cold is getting a little old now. Good thing I made a ton of vegetable stock 3 weeks ago, because nothing warms the body like a hot and rich bowl of soup! But what kind of soup? Oh, the debate is endless. Campbell's would have you believe that condensed chicken noodle is the way to turn your snowman back into your kid. But canned, condensed soups generally have way too much sodium and taste like mush. No, what you want and need is something rich, slightly spicy, and preferably nutrient rich to keep you healthy during the bad weather. I think I've got just the soup to fit that bill...

I based this recipe off this one from the NYT Recipes for Health series. I liked this recipe because it uses rice instead of cream to thicken, thus sparing some calories. It also has room for additions/changes, which I gladly took advantage of. In my case I cut out some of the carrots and onion and replaced them with celeriac to give a slightly sharper, bitter flavor to contrast the sweetness of the carrot. I also added some cayenne pepper, garlic, and other herbs while cooking to bring out an assertive bite that you taste first, followed by the sweetness of the carrot. Overall, I'm pretty happy with my version, especially when pared with some nice crusty bread.

Carrot and Celeriac Soup
1 lb. carrots, sliced thin
1 large celeriac, chopped
1/2 onion, chopped
1 tbsp butter
1 tbsp olive oil
2 cloves garlic
1/3 cup arborio rice
2 qt vegetable stock
1 tsp salt
1 tsp fresh ground pepper
1/2-1 tsp cayenne pepper
5-7 sprigs fresh thyme
1 tsp fresh sage
  1. In a soup pot, heat the butter and oil until the butter just begins to brown. Add the onion and celeriac and cook for a few minutes until the celeriac is tender (about 5-10 minutes depending on how larger your chop was).
  2. Add the carrots, garlic, salt, thyme and sage and cook, covered, for 10 minutes till the carrots are mostly cooked, stirring every so often. Fish out the thyme sprigs and add the rice and stock. Bring the pot to a boil and then simmer for 30 minutes covered.
  3. When the soup is done cooking, puree with a stick blender, in batches in a blender/food processor, or a food mill. The final product should be slightly thick and flow smoothly. Taste and add black pepper, cayenne, and more salt as you like. Serve with a sprinkling of thyme and some warm crusty bread.


IMG_0995
Freshly made soup, ready for eating!


IMG_0998
My camera doesn't do the color justice unfortunately.


Well, there you go, a simple, nutrient rich soup to warm your heart and soul this winter. I would suggest not following the above pictures and adding fresh sage as a garnish unless you chop the leaves much finer. Since this is thickened with rice, you can add a small dollop of crème fraiche or sour cream and not blow your diet if you want. You can also substitute other root vegetable such as parsnip for either the carrot or the celeriac.

Ok, so I dropped the ball in getting this out on time, I'll try to do better next time. Till then,

Cheers,
Mike :)

Sunday, January 31, 2010

Maple Walnut Chocolate Fudge

So, you know how when you're on a date that isn't going well there's a really long period of no one talking, and then the only thing you can think to comment on is the weather? Well, I'm going to comment on the weather, but hopefully you're still interested in me (or this blog really).

After a long period of having to do a ton of other things than cook/prepare blog worthy dishes, I now have at least a short respite to post some new items. But the weather, why am I bringing that up? Because it's winter, and that means two culinarily important things, fresh local fruits are pretty much nonexistent, and the air is cold and dry. What does latter part have to do with anything? Well, this post is about fudge, so the air is almost as important a factor as the ingredients. You see, fudge is mostly sugar, and sugar likes water. Fudge, however, does not like water. Traditionally, sugar based candies were made during the winter months when the air was devoid of pretty much all moisture (as I'm sure you skin can probably attest) to prevent the resulting product from getting soggy and grainy. That means that now is the perfect time to whip up some lollipops. However, I'm still a bit gun-shy after my last encounter with 305° liquid sugar, so I decided to stick to the cooler, safer "soft ball" stage, and that means fudge!

I based this recipe on Alton Brown's chocolate fudge recipe because I like it and generally have found his sugar cooking method the be the most fool proof. Alton's sugar method is fairly straight forward and I highly suggest it for any sugar cooking you do, be it for fudge, toffee, caramels, or lollipops. His technique features two main points, use a cast iron pot or griddle below your pot to evenly distribute the heat as well as keep the temperature well regulated, and right when the sugar hits a boil cover it with a lid for a short period to prevent crystallization along the sides of the pot. Use those two tips, and you'll rarely have problems working with your sugar.

Now, just a heads up, this recipe is big, I'm talking you could use this scale to set up a small fudge shop if you wanted. Fortunately, you can easily divide it in half to make it more manageable, both on your kitchen and your waistline. But I'm sure your coworkers wouldn't mind if you happened to bring in 3 lbs. of delicious fudge for them to enjoy...

Maple Walnut Chocolate Fudge:
5.5 cups sugar
8 oz. unsweetened chocolate
6 tbsp butter
1.5 cups 1/2 and 1/2
1 cup real maple syrup
2 cups walnuts
2 tsp vanilla
  1. Put your pot on a cast iron or similarly heavy metal pan or griddle to create a good heat sink/distributor. Take a 9"x15" glass baking dish and line with parchment (adhere parchment to sides by either buttering up or spraying with no-stick spray). Add the sugar, 1/2 & 1/2, maple syrup, and half of the butter into the pot and turn the heat to high. Stir till the sugar and everything else is completely dissolved.
  2. When the sugar begins to boil, drop the heat to medium, put on a lid, and let sit for ~3 minutes. After 3 minutes, remove the lid and attach your candy thermometer. Keep cooking, without stirring!, over medium high heat till the temperature reaches 240°F. At that point turn off the heat, add the remaining butter, and let sit undisturbed till the temperature comes down to around 150°F.
  3. While the mixture is cooling, toast the walnuts for ~10 minutes in a 350°F oven, tossing occasionally. Chop the nuts roughly. When the temperature of the mix is below 150, pour in the nuts and vanilla and stir vigorously with a strong (preferably wooden) spoon. When the fudge gets very difficult to manipulate, pour into the prepared pan and spread out with a silicone spatula.
  4. Allow to cool for a good 2 hours at room temperature before attempting to cut into 1" cubes. Store fudge in an air tight container or put in small bags to give away to coworkers.


IMG_0988

IMG_0991
That's only 1/4 of what this whole recipe makes!


So that's my maple walnut chocolate fudge recipe for you! As you can see, each piece has a nice distribution of nuts, and the maple syrup gives a subtle background flavor that complements the nuts and the chocolate. I'd recommend using grade B real maple syrup. It's more expensive than imitation, but the flavor is stronger and far superior. You should be able to find larger bottles for less than $20 at Whole Foods or similar markets, which is much better than the small, overpriced bottles you find in your local supermarket.

Well, that's all for now. I plan on being back with another recipe within the next week or so.

Cheers,
Mike :)

Wednesday, November 18, 2009

Bacon and Lentil Soup

So, it's mid-November, and that means cold dreary weather. Except, lately it's been rather warm here in central Ohio. I mean, it was 70°F this past weekend! Most people would be quite pleased with that, but for myself, I'm ready for winter soup season, and I want my weather to cooperate. But since I haven't yet figured out how to change the weather, I might as well get started on the soup making.

Last month I did a simple tomato soup that you hopefully read about (and made, and enjoyed!). Well, this time I'm back with another simple soup. How simple you ask? Well lets see, there are 7 ingredients, and one of them is water. You make it all in one pot in about an hour. And you probably (or at least should) have all the ingredients handy all the time. I say that last bit because everyone should have at least two containers of lentils in their cupboard (red and puy being the two). And only crazy people don't keep bacon around.

As you'll quickly see, what makes this soup so great is that it's ridiculously easy to prepare. Crisp up the bacon, cook the veggies, then add water and the lentils. In about than an hour you're eating. So lets get too it!

Bacon and lentil soup:
1 lb. pepper bacon, chopped
1 medium onion, sliced
2 ribs celery, chopped
2 carrots, coined
1 larger potato, cubed (pref. yukon gold)
1/2 cup puy lentils
4-6 cups water
  1. Put your soup pot over medium high heat and add the bacon. Cook until it crisps up then add the carrot and potato.
  2. Cook another 2 minutes then add the celery and onion. When the onion turns translucent, add the lentils and enough water to completely cover the other ingredients. Bring to a boil and then let simmer ~45 minutes.
  3. When the lentils are plump, the soup is done. Dish into bowls and enjoy!
IMG_0970
Mmmmm, yummy soup...


That was easy huh? Told ya so. Now, I know what you might be thinking... a pound of bacon, water, no salt?! Yup, yup, and yup. You see, the bacon serves a couple of roles here. The first is to provide fat for cooking the veggies. The second is to add tons of flavor. And by using pepper bacon, you've got all the seasoning you need (bacon naturally has a good amount of salt). Now, in case you're wondering, puy lentils are sometimes referred to as french lentils. I suggest buying them in bulk from Whole Foods or a similar store than a normal grocery store. Just look for the greenish/blueish ones you see below.

IMG_0972
Puy lentils, unlike red, don't get mushy when cooked, so don't substitute the two.


So, when you're in a bind, and need a fairly fast, incredibly easy, and extremely tasty dinner, give this soup a try. I can promise you that you won't regret it!

Till next time,
Cheers,
Mike :)

Wednesday, October 28, 2009

Double Chocolate Bread Pudding:

So, lets see, I get my manuscript off to my advisor to review, think I have at least a week of down-time... and I get sick. And waiting for me when I get better... revisions! Gah, the last year of grad school really is a vicious cycle of writing and trying to have a life.

Oh well, I'm back now, and with a dessert that will definitely wreck any diet you may happen to be on. My history with this particular bread pudding goes back to the beginning of the year. Coming back from my winter vacation with my mom's forgotten bread maker, I now had the means to craft all sorts of breads in my rather busy and chaotic schedule. One such bread was a brownie bread that made for great eating all on its own, but I knew would make an excellent base for bread pudding. Of course, time went buy and I never got around to it (as usual). That was, until a few weeks ago when on Throwdown with Bobby Flay they had a challenge based on chocolate bread pudding.

In that episode, Flay had to best The Dessert Truck, a NYC food wagon specializing in desserts but best known for their chocolate bread pudding with bacon crème anglaise. He lost, over-complicating things by adding coconut and a passion fruit syrup. Both contestants, however, used normal white bread (ok, brioche) and made it chocolate by adding chocolate to their custard for the pudding. You can see where I'm going with this...

Double Chocolate Bread Pudding:

For the bread:
2 tsp. yeast
3 cups bread flour
1/2 cup cocoa powder
3/4 cup sugar
1 tsp. salt
1 egg + 1 yolk
2 tbsp. butter
1 cup warm water
  1. Either put all the ingredients in a breadmaker and run on large loaf normal or follow the rest of the instructions.
  2. Add the yeast to the water with a pinch of the sugar to get it going. Sift together the flour, cocoa powder, sugar and salt. Combine the egg, yolk, and butter in a small bowl and add to the dry mix.
  3. Pour in the yeasty water and mix for about 5 minutes to incorporate well. Incubate in a warm place for 30 minutes.
  4. Pre-heat oven to 350°F. Knead dough for 5-10 minutes and incubate another 15.
  5. Add to greased loaf pans and bake in oven for ~45 minutes to an hour till set (No set time seems to work best for me).
  6. Leave the bread (no matter which way its made) out on your counter for a day (or two) to harden before trying to use in the pudding.

For the pudding:
Bread from above, cut into 1/2" cubes
2 cups heavy cream
2 cups milk
4 eggs + 2 yolks
2 tsp. vanilla extract
1 cup sugar
8 oz. dark chocolate, chopped up
  1. Combine the cream, milk, sugar, and vanilla in a saucepan and heat over medium/high heat just till it bubbles, stirring occasionally. Add the chocolate slowly and stir throughly to integrate.
  2. Whisk the eggs and yolks really well till they're pale in color in a large bowl. Slowly add the chocolate cream mixture, whisking constantly to prevent the eggs from cooking.
  3. Add the bread cubes to the custard and toss thoroughly. Pour everything into a 13x9 baking pan, distributing the bread evenly. Pre-heat the oven to 350°F now.
  4. By the time your oven warms up, the custard will have completely soaked into the bread. Give the pan a jiggle to even things out, and then bake for 35-45 minutes (this depends on how dense your bread was, but you're looking for a firm top that gives a little when pressed).
  5. Find lots of friends to share with...


IMG_0964
Brownie bread, just waiting for some custard.


IMG_0968
The final, ungodly delicious product.


So, there you have it. Straight out of the oven, the top is all nice and crusty, while the bottom is like warm chocolate mouse. You could top it with some crème anglaise, but quite frankly, this is sweet and rich enough as it is to stand on its own. If you can't find people to help you eat this all right out of the oven, don't worry, after a day in the fridge, the whole thing turns into a homogenous creamy, chocolatey mass of awesome. As I said at the beginning of this, say good bye to your diet, at least for a week.

I'm hoping to have time to post again next week, but no promises about anything from now on. Hopefully by the time I do post you'll all have recovered from your sugar coma's after making this.

Cheers,
Mike :)