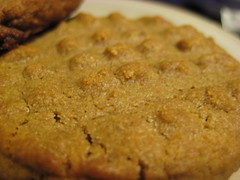
Salmonella in peanut butter shipped all over the world.
Its been in the news a lot lately. While I am certainly amazed, like many of you out there, at the severe regulatory lapses that allowed this to happen, I'm not entirely surprised either. Having worked with a number of food scientists and taken courses on food microbiology, I accept that my food is no where near as idyllic as its made out to be. But still, what are you supposed to do when you desire an Elvis Special (fried peanut butter and banana with honey)?
I would be a pretty bad blogger (esp. food blogger) if I didn't tell you how to make your own. But I'm not just going to tell you how to make peanut butter, I'm going to tell you how to make pretty much any nut butter! Ok, ok, all the recipes are essentially the same and there's only one technique and piece of equipment you need. Tell you what, I'll throw in a bonus recipe, hazelnut/chocolate spread (a.k.a. Nutella) to make up for the lack of complexity in the others. Although its precisely the lack of complexity that makes me wonder why more people don't make their own nut butters in the first place. I guess the potential for a million dollar lawsuit pay-out is just too irresistible in these uncertain economic times.
Standard Nut Butter:~1 lb nuts of choice*
salt as needed
Wow, that was a short list. Now to tackle that asterisk. Depending on the nut you choose, you'll need to do some prep. Peanuts and cashews in a can can be used straight. Almonds are best blanched and then toasted. Hazelnuts should be toasted in a pan till the skin turns dark and starts peeling, then transfer to a towel and rub the rest of the skin off (you don't need to remove all of it, just most). I haven't tried walnuts, pecans, macadamias, and some others, so those will have other pre-processing needs.
1. Place the nuts in the bowl of your food chopper and process into a fine meal like you see below (In this case I'm using cashews).
2. Keep processing in 2-3 minute runs. You'll notice that the meal will begin to clump along the edges of the bowl like in the picture below. Simply scrape down the sides as this happens.
3. Keep processing in longer spins, ~5 minutes at a time so not to burn out the motor in your processor. The combination of the heat and chopping/griding will cause the natural oils to come out, bringing the meal together into a ball that will spin around the blade.
4. Eventually, the ball will begin to disintegrate and in a couple more minutes you'll have a creamy nut butter. At this point you can add salt to taste. If you want a chunky version, throw in some raw nuts and process a bit more.
Now for what you really wanted...
Hazelnut/chocolate spread:1 lb. hazelnuts, toasted and de-skinned
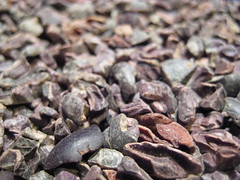
1/2 cup cacao nibs
1 cup powdered sugar, possibly more
2 tsp. vanilla extract
1. Grind the nuts in your food processor till you get fine crumbs. Add in the cacao nibs and process till you reach the smooth and creamy stage. The oils from the hazelnuts and the cacao butter will make the mix very viscous.
2. Add in the vanilla and process to incorporate, then add in the powdered sugar, one tablespoon at a time, scraping down the sides of the processor bowl often.
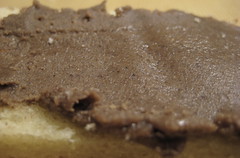
3. Depending on the creaminess you desire (Nutella is pretty thick) you may need more or less powdered sugar. You want your spread to still be fairly viscous, so don't add more than another 1/2 cup. When its at the point you want throw it in a jar or other container and put in the fridge over night, this will firm it up.
Cacao nibs. You can pick them up from Whole Foods in their bulk section. If there's no WF near you, you can get them off the internet, like here: Amazon.com Grocery
So, the texture isn't as smooth as real nutella, but it sure does taste great. The first day you take it out of the fridge it will be fairly solid and hard to spread, but don't worry, it gets better a day later.
So there you go, my super
secret easy method for making your own nut butters at home. I know there are a ton of other methods listed out there on the internet, but most of those tell you to use some form of oil to get the desired consistency. In my experience, most nuts have enough natural oils that any extra oil is unnecessary. However, depending on the state of the
buts nuts you purchased (i.e. the pre-bagged ones you find in your local grocer's "baking" isle) then you may actually need to use the oil. In those cases, the nuts have been around long enough that the natural oils are gone and need to be replaced. Ideally, you should use the same oil as the nut you're using (almond oil for almond butter, for instance) but failing that, neutral flavored oils such as canola or vegetable work best. Just don't use more than 2 tbsp. per pound of nuts. If you think you need more than that, then I'd say your batch (nuts) weren't good in the first place and you should just pitch it and move on.