Example Edible Eats toddler shirt!
Tuesday, December 30, 2008
A foodie/baby giveaway (not from me though)...
Like most new food blogs, family and friends make up the bulk of my current readership (although I love my non-familial followers just as much!) so this is post is for them (mostly). Damaris over at Within the Corners of my Kitchen recently posted about a new giveaway from Edible Baby. They specialize in cute baby/toddler clothes with foodie themes. In the past two years, four of my cousins have each had baby boys, so baby clothing is definitely on their buy lists. I'm posting about this giveaway to give them notice and also help publicize a fellow blogger. So again, check out Damaris' blog and giveaway.

Example Edible Eats toddler shirt!
Example Edible Eats toddler shirt!
Reminiscing:
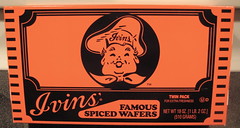
Back in my ginger snaps post I mentioned a brand of cookies that I rarely see anymore, especially now that I live in Ohio. But when I was a kid, I could remember display walls lined with the boxes in the grocery store. While I'm back in DE to see family for the holidays, I was hoping that I could find them again... and I did!. They're Ivin's spice wafers. Not exactly ginger snaps, but they definitely carry a nice ginger flavor (it only lists "spices" in the ingredient list to give you any idea of what actually gives them flavor beyond molasses). I also solved the issue of why you can't find them in OH. They're essentially a store brand for the Albertsons grocery chains, of which there are none in OH. But yay for finding they're still made, even if they clearly aren't as popular anymore.
Having already taken a short stroll down memory lane myself, I saw today that Serious Eats did a post on their top posts of the year. One of them was from April (before I started following I'll admit) and went over a top ten of foods from the 80's and 90's that are sadly no longer with us (well, sadly for some, I'm sure there are those who rejoiced at their demise). I'd highly recommend taking a look (Linky) especially if you were born within the past 30 years. I will take issue with Crystal Pepsi being #10, and even worse, behind #5 Ecto Cooler (hey, I loved Ecto as much as any kid, but Crystal Pepsi was the best).
Having already taken a short stroll down memory lane myself, I saw today that Serious Eats did a post on their top posts of the year. One of them was from April (before I started following I'll admit) and went over a top ten of foods from the 80's and 90's that are sadly no longer with us (well, sadly for some, I'm sure there are those who rejoiced at their demise). I'd highly recommend taking a look (Linky) especially if you were born within the past 30 years. I will take issue with Crystal Pepsi being #10, and even worse, behind #5 Ecto Cooler (hey, I loved Ecto as much as any kid, but Crystal Pepsi was the best).
Wednesday, December 24, 2008
Red currant cream scones with kumquat glaze
One of the best things about having my mother visit for the holidays is the inevitable trip to Whole Foods on her dime. Its not that I take advantage, but I'm usually able to get away with getting a new/exotic (and since its WF not really cheap) ingredient to cook with. This particular time I grabbed some kumquats and fresh red currants.
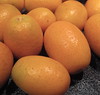
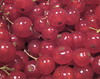
Now, for those that don't know, kumquats are odd little fruits. In the opposite fashion of most citrus, the skin is sweet while the flesh is tart. They can be eaten without peeling, although they do have seeds in them so watch out if you pop one in your mouth. Red currants, unlike their black cousins, are also slightly tart, so they generally aren't for eating raw but used as an ingredient in another dish. So, what is a person to do with them? Well, I've always felt that sour goes well with savory, so using them as a sauce for a pork tenderloin was an idea. But then the idea of scones popped into my head.
There are generally two type of scones that people make, cream or buttermilk. Logically, they only differ by type of dairy used, but the flavor profiles can dictate what other flavors you use. Since cream scones carry a sweeter and lighter flavor I figured that would work best with the tartness of the currants. To follow up on the sweet/tart combo, I decided to use the kumquats to make a glaze. So lets get with it:
Red Currant Cream Scones:
2 cups flour
1 tbsp baking powder
1 tsp salt
1/3 cup sugar
1/4 cup butter, chilled and cut into 1/4" cubes
3/4 cup cream
1 large egg, lightly wisked
1 pint currants, dusted in flour
1. Sift together the dry ingredients. Cut the butter into the flour mix until the butter is covered and resembles fine crumbs. (I use my finger tips, but you could do all this in a food processor if you want)
2. Combine the cream and egg and fold the wet mix into the dry ingredients just to incorporate.
3. Fold in the currants, taking care not to smash them up too much.
4. Roll the dough on a floured work surface to get a snake roughly 3-4" thick. Wrap the dough in plastic wrap and chill in the fridge for 30 minutes. Turn on oven to 400 deg.
5. Slice dough into inch thick rounds and place on a parchment lined baking sheet. Bake for 15-20 minutes (tops should be lightly browned).
6. Allow to cool completely before glazing.
NOTES: The cut rounds can be placed in a freezer bag and frozen for a good month (possibly longer although I've never had them last that long). You can bake them straight from the freezer, just adjust the cooking time as necessary.

Kumquat glaze:
2 tbsp. butter
2 cups confectioners sugar
1 pint kumquats, washed
1. Slice the kumquats and de-seed. Place in a food processor or blender and puree.
2. Strain off juice and add to a pan with the butter and sugar. Cook over medium heat till thick (coats the back of a spoon). Remove from heat and cool on counter.
3. When glaze is cool but sill flows, pour over cooled scones.
4. Keep extra glaze in an airtight container in the fridge for up to 1 month.

These scones are really tasty, and if you freeze the rounds, pretty convenient. The sweet/tart combinations between the scone, the currants, and the kumquat glaze is nice and refreshing. In retrospect, the only thing I regret was not using the kumquat pulp in a batch of the scones themselves and doing a currant glaze to see how that worked (DO save the pulp and use though, its a total waste to simply throw it out). If you don't have currants or kumquats available (not everyone's mother will buy them I'm sure) you can easily substitute blueberries for the currants and oranges for the glaze. Or really, a lot of other fruits for that matter. The base recipe for both the scone dough and the glaze is pretty flexible if you're willing to experiment. And if you come up with some new/amazing combination, let me know, I'd love try it myself.
And since its that time of the year, have a great Christmas/your preferred holiday and a happy New Years everyone!
Now, for those that don't know, kumquats are odd little fruits. In the opposite fashion of most citrus, the skin is sweet while the flesh is tart. They can be eaten without peeling, although they do have seeds in them so watch out if you pop one in your mouth. Red currants, unlike their black cousins, are also slightly tart, so they generally aren't for eating raw but used as an ingredient in another dish. So, what is a person to do with them? Well, I've always felt that sour goes well with savory, so using them as a sauce for a pork tenderloin was an idea. But then the idea of scones popped into my head.
There are generally two type of scones that people make, cream or buttermilk. Logically, they only differ by type of dairy used, but the flavor profiles can dictate what other flavors you use. Since cream scones carry a sweeter and lighter flavor I figured that would work best with the tartness of the currants. To follow up on the sweet/tart combo, I decided to use the kumquats to make a glaze. So lets get with it:
Red Currant Cream Scones:
2 cups flour
1 tbsp baking powder
1 tsp salt
1/3 cup sugar
1/4 cup butter, chilled and cut into 1/4" cubes
3/4 cup cream
1 large egg, lightly wisked
1 pint currants, dusted in flour
1. Sift together the dry ingredients. Cut the butter into the flour mix until the butter is covered and resembles fine crumbs. (I use my finger tips, but you could do all this in a food processor if you want)
2. Combine the cream and egg and fold the wet mix into the dry ingredients just to incorporate.
3. Fold in the currants, taking care not to smash them up too much.
4. Roll the dough on a floured work surface to get a snake roughly 3-4" thick. Wrap the dough in plastic wrap and chill in the fridge for 30 minutes. Turn on oven to 400 deg.
5. Slice dough into inch thick rounds and place on a parchment lined baking sheet. Bake for 15-20 minutes (tops should be lightly browned).
6. Allow to cool completely before glazing.
NOTES: The cut rounds can be placed in a freezer bag and frozen for a good month (possibly longer although I've never had them last that long). You can bake them straight from the freezer, just adjust the cooking time as necessary.
Kumquat glaze:
2 tbsp. butter
2 cups confectioners sugar
1 pint kumquats, washed
1. Slice the kumquats and de-seed. Place in a food processor or blender and puree.
2. Strain off juice and add to a pan with the butter and sugar. Cook over medium heat till thick (coats the back of a spoon). Remove from heat and cool on counter.
3. When glaze is cool but sill flows, pour over cooled scones.
4. Keep extra glaze in an airtight container in the fridge for up to 1 month.
These scones are really tasty, and if you freeze the rounds, pretty convenient. The sweet/tart combinations between the scone, the currants, and the kumquat glaze is nice and refreshing. In retrospect, the only thing I regret was not using the kumquat pulp in a batch of the scones themselves and doing a currant glaze to see how that worked (DO save the pulp and use though, its a total waste to simply throw it out). If you don't have currants or kumquats available (not everyone's mother will buy them I'm sure) you can easily substitute blueberries for the currants and oranges for the glaze. Or really, a lot of other fruits for that matter. The base recipe for both the scone dough and the glaze is pretty flexible if you're willing to experiment. And if you come up with some new/amazing combination, let me know, I'd love try it myself.
And since its that time of the year, have a great Christmas/your preferred holiday and a happy New Years everyone!
Friday, December 19, 2008
Make your own sushi:
Sushi always seems to be one of those hot topic foods no matter what the actual topic is. People debate where the best place to go for it is. People debate the best kinds to get. People debate the proper way to eat it. People debate the ecological costs associated with the overfishing of blue-fin tuna specifically for sushi. Actually, that last one isn't talked about enough I feel, even if it is the most important. I'll leave my opinions on that issue for another post next week, because for all the discussion on sushi, making it at home always seems to be the biggest debate always seems to be about making it yourself at home.
Its natural to be wary of making your own sushi. Fish and other seafood have a nasty reputation for carrying unwanted bacteria (and in the case of some shellfish, viruses such as hepatitis). Now, that reputation, while partly true (fish will spoil much quicker than other meats) is also less of a concern now due to the rising quality of fish available in your local market. If I have some extra money in my budget, I'll go to Whole Foods and chat with the people at the fresh fish bar to see what they recommend as the freshest fish. And when I don't have that extra freedom, I go the faux-crab and smoked salmon route. And there's always vegetarian sushi.
So how do you make sushi? What kind of expensive or odd equipment do you need? And what bizarre and expensive do you need to buy? Well, let me set your fears at ease: Sushi is easy to make, using simple (cheap) base ingredients and the utensils and equipment you probably already have in your home! Below I'll show you how I do it and how simple it can be for you too.

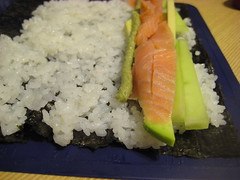
The basic ingredients that I used are shown above: cucmber, avocado, left over smoked salmon, and faux crabmeat. In the background in the bag are sheets of nori, pressed sheets of algae (its not seaweed actually) that you wrap the roll in.
1. Step one is to make your rice. You'll want a high quality sushi/short grain rice that has been well rinsed to removed the dust that will naturally accumulate. Place 1 cup of rinsed rice in a pot with 1 cup of water and bring to a boil. Once it does, drop the heat to low and cover. After 15 minutes remove from the heat completely and let the rice sit for 10 minutes. During that 10 minute rest, place 1 tbsp of rice vinegar and 1 tbsp sugar in a small dish with a small pinch of salt and microwave for 30 seconds. After the 10 minutes, transfer the rice to a bowl (preferably wood, glass, or stainless steel in that order) and pour the vinegar over the rice. Using a wooden spoon, mix up the rice to get it all coated and quickly cool it to room temp.

2. Once the rice is done, the rest of the job is assembly. Place a sheet of nori on a flexible silicone baking mat and cover all but a 1 inch strip at the end farthest away from you with rice.

3. Lay down your ingredients at the end closest to you, making sure not to add too much or else you'll overload the roll.
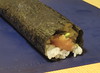
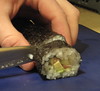
4. Using the mat, roll the end with the ingredients over onto itself, pushing excess mat ahead of you. Keep even and firm pressure on the roll, moving your hands to the edges slowly from the center with each roll. Once you've reached the end, use your fingers to firmly push on all sides to get the nori wet from the rice, which is what will seal the roll closed. Use a long, thin bladed knife and a short sawing motion to slice the roll into roughly 1/2" sized pieces.

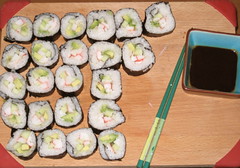
To serve, do it however you want and will enjoy it. I prefer the dish of soy sauce with some wasabi mixed in route.
If you don't have a silicon baking mat, you could probably get away with using a sheet of parchment paper. There absolutely no need to have a specialty bamboo mat that you'll rarely use. And don't even bother with those kits that sell for $50 or so that claim to give you everything you need and will ever want. The rice can be bought in bulk from Whole Foods for cheap, nori is fairly inexpensive (especially if you buy it at an asian market), and you can dictate how much you spend on the fish depending on what you want to buy. So if you've ever thought of making your own sushi but were either too afraid to try it, or didn't want to deal with specialty equipment and ingredients, take heart, its not the big mystery your local sushi restaurant wants you to think it should be.
I'm on break till the end of the year to see family, so posting might be light, so I'll take the opportunity now to say Happy Holidays everyone!
Its natural to be wary of making your own sushi. Fish and other seafood have a nasty reputation for carrying unwanted bacteria (and in the case of some shellfish, viruses such as hepatitis). Now, that reputation, while partly true (fish will spoil much quicker than other meats) is also less of a concern now due to the rising quality of fish available in your local market. If I have some extra money in my budget, I'll go to Whole Foods and chat with the people at the fresh fish bar to see what they recommend as the freshest fish. And when I don't have that extra freedom, I go the faux-crab and smoked salmon route. And there's always vegetarian sushi.
So how do you make sushi? What kind of expensive or odd equipment do you need? And what bizarre and expensive do you need to buy? Well, let me set your fears at ease: Sushi is easy to make, using simple (cheap) base ingredients and the utensils and equipment you probably already have in your home! Below I'll show you how I do it and how simple it can be for you too.
The basic ingredients that I used are shown above: cucmber, avocado, left over smoked salmon, and faux crabmeat. In the background in the bag are sheets of nori, pressed sheets of algae (its not seaweed actually) that you wrap the roll in.
1. Step one is to make your rice. You'll want a high quality sushi/short grain rice that has been well rinsed to removed the dust that will naturally accumulate. Place 1 cup of rinsed rice in a pot with 1 cup of water and bring to a boil. Once it does, drop the heat to low and cover. After 15 minutes remove from the heat completely and let the rice sit for 10 minutes. During that 10 minute rest, place 1 tbsp of rice vinegar and 1 tbsp sugar in a small dish with a small pinch of salt and microwave for 30 seconds. After the 10 minutes, transfer the rice to a bowl (preferably wood, glass, or stainless steel in that order) and pour the vinegar over the rice. Using a wooden spoon, mix up the rice to get it all coated and quickly cool it to room temp.
2. Once the rice is done, the rest of the job is assembly. Place a sheet of nori on a flexible silicone baking mat and cover all but a 1 inch strip at the end farthest away from you with rice.
3. Lay down your ingredients at the end closest to you, making sure not to add too much or else you'll overload the roll.
4. Using the mat, roll the end with the ingredients over onto itself, pushing excess mat ahead of you. Keep even and firm pressure on the roll, moving your hands to the edges slowly from the center with each roll. Once you've reached the end, use your fingers to firmly push on all sides to get the nori wet from the rice, which is what will seal the roll closed. Use a long, thin bladed knife and a short sawing motion to slice the roll into roughly 1/2" sized pieces.
To serve, do it however you want and will enjoy it. I prefer the dish of soy sauce with some wasabi mixed in route.
If you don't have a silicon baking mat, you could probably get away with using a sheet of parchment paper. There absolutely no need to have a specialty bamboo mat that you'll rarely use. And don't even bother with those kits that sell for $50 or so that claim to give you everything you need and will ever want. The rice can be bought in bulk from Whole Foods for cheap, nori is fairly inexpensive (especially if you buy it at an asian market), and you can dictate how much you spend on the fish depending on what you want to buy. So if you've ever thought of making your own sushi but were either too afraid to try it, or didn't want to deal with specialty equipment and ingredients, take heart, its not the big mystery your local sushi restaurant wants you to think it should be.
I'm on break till the end of the year to see family, so posting might be light, so I'll take the opportunity now to say Happy Holidays everyone!
Wednesday, December 17, 2008
I am no Michael Symon
Somehow, during a conversation with some of my co-workers, the issue of odd flavor combinations came up yesterday. I had remember reading something in the NYT about chocolate covered bacon and how it was an either love it or hate it type deal (link to the article). One of my friends said that chef Michael Symon did it once on an episode of Dinner Impossible (apparently I missed that episode but here it is if you wish to watch) and that she would be open to trying it. Now, being a scientist who cooks, I'm pretty much willing to try anything at least 3 times. Having easy access to cheap bacon and keeping an ample supply of chocolate in my house just makes things easier. So, after frying up a couple slices, tearing them into small pieces, and covering them in dark chocolate last night I sampled as many people in my department as I could find to get their impression.
End results: some liked it, some where disgusted, and a few said it would have worked better with milk chocolate and crispier bacon (that would primarily be my friend who said that's how Michael Symon did it). I would have to agree with her though. I buy the big bags of the Ghiradelli dark chocolate chips from Sam's Club (and 25# bags of flour and sugar for that matter) because its cheaper and I use dark chocolate when I make truffles (yes, there will be a post about the flavor combinations I've done). Unfortunately, there was a strong fruity note that didn't jive well with the bacon. I think I may need to start keeping a supply of milk chocolate chips
now. I'll let you know how the next batch turns out.
Also, NYT has a rather interesting article about butter and its importance in baking, check it out, its a good read (Linky)
Sunday, December 14, 2008
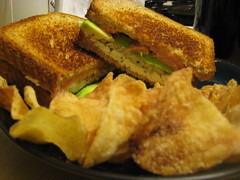
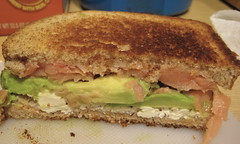
Toasted salmon, avocado, and feta sandwich
During the summer of 2004, I had the great opportunity to travel to South Africa for 2 months and do research. I met a number of wonderful people and visited some awesome places. It was unforgettable. Especially the food. South Africa (ZA) isn't particularly known for its food. Its food heritage is a mix of English, Dutch, and traditional tribal. That sums up to lots of meats, lots of fried stuff, and lots of sweet stuff... mostly. There are of course some notable gems. Rooibos tea is one of my absolute favorites (I'd recommend Freshpak Rooibos which is a ZA brand and a great value). Biltong, which is similar but very much not jerky, is so loved by South Africans that there are literally stands in the mall that sell only that. Those may be the two most well known staples of the ZA diet, but there's certainly more.
Because it was the middle of the ZA winter, the university I was working at was on break for much of the time I was there. This meant that most of the shops on the campus were closed. Lunch came to be a choice between a pie shop (meat pies), a burger shop, and a sandwich shop (or packing). In an attempt to be healthy, I stuck with the sandwich shop, which had a number of unique and tasty creations. The one that became my standard was smoked salmon, avocado, and feta cheese on toasted brown bread (bread in ZA pretty much comes in either white or brown). Ever since I came back to the US this has become a staple of my repertoire.
Toasted salmon, avocado, and feta sandwich:
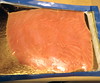
Smoked salmon
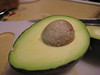
1/4 avocado, sliced
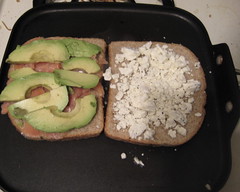
1/4 cup crumbled feta (I prefer the kind with black peppercorns)
2 slices bread
Assembly is quick and easy: Set a non-stick flat griddle over medium heat. Butter the outsides of the bread and place on the griddle when hot. Lay thin slice of the smoked salmon on on piece of bread and top with the avocavado. Spread the crumbled feta across the other piece of bread. Toast the edges until just beginning to brown. Flip the side with the salmon and avo onto the cheese side and drop the heat. Continue toasting till the cheese begins to soften. Serve with chips or a cup of soup and enjoy.
There will be one last seafood related post coming up, and after that I've got a special cupcake post so stay tuned!
Because it was the middle of the ZA winter, the university I was working at was on break for much of the time I was there. This meant that most of the shops on the campus were closed. Lunch came to be a choice between a pie shop (meat pies), a burger shop, and a sandwich shop (or packing). In an attempt to be healthy, I stuck with the sandwich shop, which had a number of unique and tasty creations. The one that became my standard was smoked salmon, avocado, and feta cheese on toasted brown bread (bread in ZA pretty much comes in either white or brown). Ever since I came back to the US this has become a staple of my repertoire.
Toasted salmon, avocado, and feta sandwich:
Smoked salmon
1/4 avocado, sliced
1/4 cup crumbled feta (I prefer the kind with black peppercorns)
2 slices bread
Assembly is quick and easy: Set a non-stick flat griddle over medium heat. Butter the outsides of the bread and place on the griddle when hot. Lay thin slice of the smoked salmon on on piece of bread and top with the avocavado. Spread the crumbled feta across the other piece of bread. Toast the edges until just beginning to brown. Flip the side with the salmon and avo onto the cheese side and drop the heat. Continue toasting till the cheese begins to soften. Serve with chips or a cup of soup and enjoy.
There will be one last seafood related post coming up, and after that I've got a special cupcake post so stay tuned!
Thursday, December 11, 2008
A note on herbs and spices:
In my first recipe, ginger snaps, I noted that I use ginger paste that comes in a tube. Since not everyone has seen or used it before, I figure its worth doing an information post about.
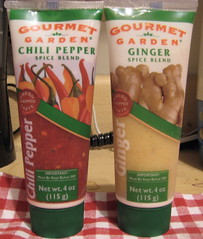
Its not the only brand available, but Gourmet Garden is the one I use and have seen most. Generally you can find these near the other fresh packaged herbs in your local grocery's produce section. They're not that cheap compared to fresh, running around $4-5 each in OH, but they have one major advantage that fresh herbs don't. You can store these in the freezer and keep them for at least three months (they say on the tube that you can extend the usable life that long past the use-by date, although I'd reckon you can easily push that longer).
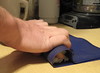
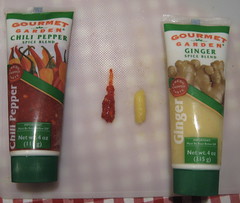
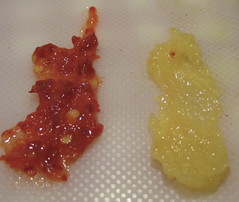
So aside from longevity why else would you want to use these? Well, for one, there's no need to thaw them as they still squeeze right out of the freezer as you can see.
That may not seem like much of a trick, as dried herbs are just as convenient (if not more so). But the flavor difference is definitely in favor of the tube. There's also an ease of use factor that's hard to quantify. Making an asian stir-fry? Well, you can certainly use fresh chili's but that means keeping some around and makes spontaneous stir-frys less likely (never know when tofu is on manager's special). Suddenly remember that you said you'd bring the ginger glazed carrots to your mother-in-laws family dinner? Ground ginger in a tube to the rescue!
Now, these won't always replace either fresh or dried herbs/spices. I personally prefer using fresh parsley, basil, cilantro, etc than the tube variety because the large pieces add a visual component. Dried spices also have their own virtues, notable dry rubs and certain baked goods. The tube versions also carry more sugar than I would like (although I have nothing against the emulsifiers as I work with a number of food scientists).
Bottom line: try them out. You'll probably find that the convenience of having "fresh" herbs and spices around leads you to use them more in your everyday cooking than if you had to find a bunch of uses for all that wilting parsley you bought.
Its not the only brand available, but Gourmet Garden is the one I use and have seen most. Generally you can find these near the other fresh packaged herbs in your local grocery's produce section. They're not that cheap compared to fresh, running around $4-5 each in OH, but they have one major advantage that fresh herbs don't. You can store these in the freezer and keep them for at least three months (they say on the tube that you can extend the usable life that long past the use-by date, although I'd reckon you can easily push that longer).
So aside from longevity why else would you want to use these? Well, for one, there's no need to thaw them as they still squeeze right out of the freezer as you can see.
That may not seem like much of a trick, as dried herbs are just as convenient (if not more so). But the flavor difference is definitely in favor of the tube. There's also an ease of use factor that's hard to quantify. Making an asian stir-fry? Well, you can certainly use fresh chili's but that means keeping some around and makes spontaneous stir-frys less likely (never know when tofu is on manager's special). Suddenly remember that you said you'd bring the ginger glazed carrots to your mother-in-laws family dinner? Ground ginger in a tube to the rescue!
Now, these won't always replace either fresh or dried herbs/spices. I personally prefer using fresh parsley, basil, cilantro, etc than the tube variety because the large pieces add a visual component. Dried spices also have their own virtues, notable dry rubs and certain baked goods. The tube versions also carry more sugar than I would like (although I have nothing against the emulsifiers as I work with a number of food scientists).
Bottom line: try them out. You'll probably find that the convenience of having "fresh" herbs and spices around leads you to use them more in your everyday cooking than if you had to find a bunch of uses for all that wilting parsley you bought.
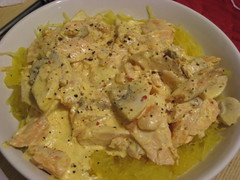
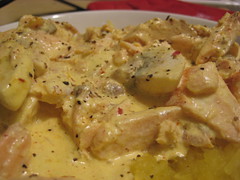
Salmon with mushrooms and spaghetti squash in saffron sauce
Proving that I do more than bake, I'm offering my first "dinner" recipe. Now, I meant to have this posted last night, but I just started Netflix and got my first disc of the old Doctor Who series, so yeah last night was really unproductive. Sort of. But that will be for a later post.
I'm not sure why so many people I meet either outright hate or strongly dislike fish. Growing up in DE, and having family scattered along the Eastern Seaboard, seafood was naturally a part of my diet growing up. I've presumed that its because I now live in the "midwest" and thus really fresh seafood is a bit lacking. But its 2008 (for a little while longer at least) and modern transportation means that even the Kroger down the street from me has pretty decent fish fillets and shellfish. Maybe its an unsolvable mystery like reconciling quantum theory with Newtonian physics... or how many licks it takes to get to the center of Tootsie Roll Pop™.
Either way, I love fish. And shellfish. And even things that remotely fall into that category such as caviar, escargot, frog legs, 'gator, conch. I'm game for any of it. So, what happens is that whenever I go to the grocery store, I check out the seafood case. Now, being a graduate student, fish should be a luxury since its not the cheapest source of protein by far. To reconcile these two facts, I've taken to only buying items on managers special. They don't look the best, but you often have a good day, maybe two before you should pause before using it. And its half the price for what is still good quality food. So on a recent trip I found some nice sized salmon filets and picked two up. Now, when you buy any meat, and especially seafood knowing you need to use it within a day or two, you often need to get creative with what you make depending on what else you have available.
In my case, it was some left over spaghetti squash and some managers special mushrooms that I had picked up as well. I could have gone the easy route, sauté the mushrooms, broil the salmon with a quick garlic/olive oil glaze, re-heat the squash, throw it all together with a light drizzle of olive oil and some fresh pepper, and call it a night. But I remembered a recipe Mark Bittman posted on his blog once about fish with a saffron sauce made with yogurt. Since I generally have yogurt around since I usually make my own, I figured I'd give it a whirl. Now, his recipe calls for making the saffron sauce, and then drizzling it on cooked halibut filets. I of course changed it up a bit.
Salmon with Mushrooms and Spaghetti Squash in Saffron Sauce:
Saffron yogurt sauce:
1/2 cup yogurt*
1 pinch saffron threads
couple grinds of pepper
1/4 tsp. dill
Combine ingredients in a small cup or bowl, crushing the saffron as fine as possible. Incubate at room temperature for ~1 hour. The sauce should take on a faint yellow/orange color.

Notes: You can make the sauce a day ahead of time and incubate in the fridge to amp up the flavor.
*As I said, I make my own yogurt. I'd suggest using full fat or even greek, especially if you heat it like I did. If you want to use low/no fat, you'll probably want to drain it to remove as much extra liquid as possible.
Pan seared salmon, mushrooms and squash:
~1 cup spaghetti squash previously pulled into threads
1 salmon fillet
3 large crimini* mushrooms sliced
salt and fresh ground pepper as desired
Heat a non-stick pan over high heat. When hot, place the salmon fillet skin side up and sear the top for 1-2 minutes. Turn over and drop the heat to medium and cook till salmon is cooked through (time will depend on the thickness of the fillet). While the salmon is cooking, add a small amount of olive oil to a sauté pan over medium heat. When oil is fragrant, add the mushrooms and squash and cook till heated through. When salmon is done, remove skin and cut into small chunks. Add salmon to mushrooms and squash and add saffron sauce. Raise heat to high and cook just till the sauce is hot. Eat, enjoy.
My thoughts:
I liked the combination, and the saffron was still present but a bit muted by the stronger flavor of the salmon. I didn't follow the exact method I described above. I microwaved my squash and topped it with the salmon and mushrooms which has been cooked in the sauce. In retrospect, this caused the meal to be a little watery as the squash gave up liquid which I didn't drain off. If you cook the squash with the mushrooms, they should absorb the liquid and thus you shouldn't have that problem.
I've got a lot more recipes coming in the following weeks, one of which I'm still trying to perfect but I'm super excited about sharing when its done. So if you're enjoying this blog as much as I am so far, great. Share it with all your friends. And family. And co-workers. Heck, even strangers.
I'm not sure why so many people I meet either outright hate or strongly dislike fish. Growing up in DE, and having family scattered along the Eastern Seaboard, seafood was naturally a part of my diet growing up. I've presumed that its because I now live in the "midwest" and thus really fresh seafood is a bit lacking. But its 2008 (for a little while longer at least) and modern transportation means that even the Kroger down the street from me has pretty decent fish fillets and shellfish. Maybe its an unsolvable mystery like reconciling quantum theory with Newtonian physics... or how many licks it takes to get to the center of Tootsie Roll Pop™.
Either way, I love fish. And shellfish. And even things that remotely fall into that category such as caviar, escargot, frog legs, 'gator, conch. I'm game for any of it. So, what happens is that whenever I go to the grocery store, I check out the seafood case. Now, being a graduate student, fish should be a luxury since its not the cheapest source of protein by far. To reconcile these two facts, I've taken to only buying items on managers special. They don't look the best, but you often have a good day, maybe two before you should pause before using it. And its half the price for what is still good quality food. So on a recent trip I found some nice sized salmon filets and picked two up. Now, when you buy any meat, and especially seafood knowing you need to use it within a day or two, you often need to get creative with what you make depending on what else you have available.
In my case, it was some left over spaghetti squash and some managers special mushrooms that I had picked up as well. I could have gone the easy route, sauté the mushrooms, broil the salmon with a quick garlic/olive oil glaze, re-heat the squash, throw it all together with a light drizzle of olive oil and some fresh pepper, and call it a night. But I remembered a recipe Mark Bittman posted on his blog once about fish with a saffron sauce made with yogurt. Since I generally have yogurt around since I usually make my own, I figured I'd give it a whirl. Now, his recipe calls for making the saffron sauce, and then drizzling it on cooked halibut filets. I of course changed it up a bit.
Salmon with Mushrooms and Spaghetti Squash in Saffron Sauce:
Saffron yogurt sauce:
1/2 cup yogurt*
1 pinch saffron threads
couple grinds of pepper
1/4 tsp. dill
Combine ingredients in a small cup or bowl, crushing the saffron as fine as possible. Incubate at room temperature for ~1 hour. The sauce should take on a faint yellow/orange color.
Notes: You can make the sauce a day ahead of time and incubate in the fridge to amp up the flavor.
*As I said, I make my own yogurt. I'd suggest using full fat or even greek, especially if you heat it like I did. If you want to use low/no fat, you'll probably want to drain it to remove as much extra liquid as possible.
Pan seared salmon, mushrooms and squash:
~1 cup spaghetti squash previously pulled into threads
1 salmon fillet
3 large crimini* mushrooms sliced
salt and fresh ground pepper as desired
Heat a non-stick pan over high heat. When hot, place the salmon fillet skin side up and sear the top for 1-2 minutes. Turn over and drop the heat to medium and cook till salmon is cooked through (time will depend on the thickness of the fillet). While the salmon is cooking, add a small amount of olive oil to a sauté pan over medium heat. When oil is fragrant, add the mushrooms and squash and cook till heated through. When salmon is done, remove skin and cut into small chunks. Add salmon to mushrooms and squash and add saffron sauce. Raise heat to high and cook just till the sauce is hot. Eat, enjoy.
My thoughts:
I liked the combination, and the saffron was still present but a bit muted by the stronger flavor of the salmon. I didn't follow the exact method I described above. I microwaved my squash and topped it with the salmon and mushrooms which has been cooked in the sauce. In retrospect, this caused the meal to be a little watery as the squash gave up liquid which I didn't drain off. If you cook the squash with the mushrooms, they should absorb the liquid and thus you shouldn't have that problem.
I've got a lot more recipes coming in the following weeks, one of which I'm still trying to perfect but I'm super excited about sharing when its done. So if you're enjoying this blog as much as I am so far, great. Share it with all your friends. And family. And co-workers. Heck, even strangers.
Tuesday, December 9, 2008
Ginger snaps:
Ok, so I promised, and now that I found the charger for my camera battery, I'm able to deliver. Here, finally, is my inaugural recipe. And to make this whole task even more daunting, this recipe is also being submitted to Susan over at Food Blogga in support of her Eat Christmas Cookies event! So for those of you who are venturing over from her site, welcome. And anyone else who may be stumbling upon this site, welcome to you too.

One of my random winter(holiday) memories from my childhood was this brand of ginger snaps that my dad loved that came in this orange box. I have no idea what brand it was, but I can remember just how they tasted. Yummy. Especially when dunked in milk. Ever since moving out to Ohio I've never seen them again. So, after seeing Susan's notice about the Eat Christmas Cookies event I knew that I wanted to submit a ginger snaps recipe. Not just to support a great event, but to have an excuse to eat ginger snaps again (how many batches does it take to perfect a recipe?). Good thing I recently bought more milk.
These cookies are an amalgam of a couple recipes that I found on the internet and my own random cooking/baking intuition, and despite using an obscene amount of butter all in one go, they're awesome. And thats not just my opinion, everyone I pawned them off on (this recipe makes A LOT of cookies) loved them too! You may find yourself with a few new friends around the office after bringing in a batch of these. Although they may think you're trying to fatten them up when you give them each a gallon sized Ziploc bag full. So now, without further ado...
Ginger Snaps:
Makes roughly 7 dozen cookies!
1 1/2 cups butter
2 cups sugar
3/4 cup molasses
2 eggs
4 1/2 cups flour
4 tsp baking soda
1 tsp salt
4 tbsp ground ginger paste
2 tsp cinnamon
1 tsp ground nutmeg
1. Preheat oven to 375 degrees and line baking sheets with parchment.
2. Cream butter and sugar until fluffy. Add molasses and eggs and mix well.
3. Sift together flour, baking soda, salt, cinnamon, and nutmeg. Add dry ingredients to butter mixture in batches and mix thoroughly. Lastly, blend in the ginger paste.
4. Drop dough by teaspoonful onto baking sheets, about 2 inches apart.
5. Bake for 10-12 minutes. Cool 2-3 minutes on the baking sheet before transferring to a wire rack.
Notes: Cookies will be crisp but not hard, adjust time as desired for slightly softer/harder cookies. I've had a comment from a reader who asked about the ginger paste. The kind I use is in a tube, similar to this brand. I find mine in the produce section of my local grocery store and the stuff stores beautifully in the freezer for a few months (its still squeezable!). If you can't find tube based, you might also find it in jars in the "Ethnic Foods" section, but you should check the ingredients to make sure it doesn't include garlic or other ingredients that might not work in a cookie recipe. You can always use ground ginger from your spice rack (~1 tbsp depending on how strong it is) and some finely chopped candied ginger. I'll probably make a post about the ginger paste and its usefulness later this week for those who would like more details.
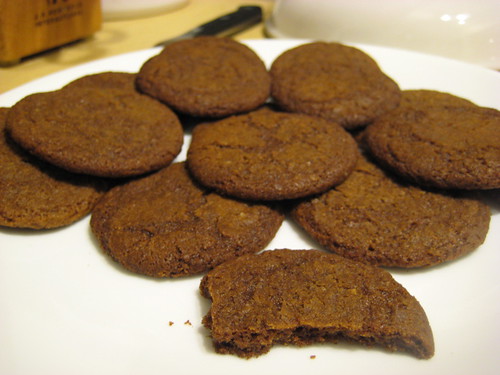
The results?
They're just like I remembered. Perfect size, color, shape, texture and most importantly, taste.
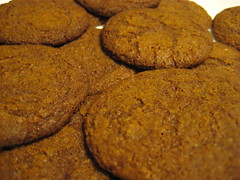
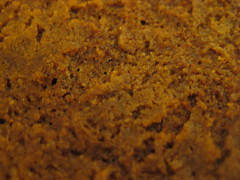
What I like most about using the ginger paste over ground ginger is that you can still see the flecks of ginger in the cookie after its baked. You could use ground ginger along with candied ginger though, but then you would want to chop the candied ginger into finer pieces.
So, I hope you all enjoy the first recipe for this blog. More will be added shortly so I hope you come back and find some new/interesting/possibly odd recipes to try at your own home. And don't forget to check out all the other recipes submitted for Eat Christmas Cookies. I know I have a few on my weekend/vacation to-do list now. Oh, and comments are highly encouraged! Take care.
One of my random winter(holiday) memories from my childhood was this brand of ginger snaps that my dad loved that came in this orange box. I have no idea what brand it was, but I can remember just how they tasted. Yummy. Especially when dunked in milk. Ever since moving out to Ohio I've never seen them again. So, after seeing Susan's notice about the Eat Christmas Cookies event I knew that I wanted to submit a ginger snaps recipe. Not just to support a great event, but to have an excuse to eat ginger snaps again (how many batches does it take to perfect a recipe?). Good thing I recently bought more milk.
These cookies are an amalgam of a couple recipes that I found on the internet and my own random cooking/baking intuition, and despite using an obscene amount of butter all in one go, they're awesome. And thats not just my opinion, everyone I pawned them off on (this recipe makes A LOT of cookies) loved them too! You may find yourself with a few new friends around the office after bringing in a batch of these. Although they may think you're trying to fatten them up when you give them each a gallon sized Ziploc bag full. So now, without further ado...
Ginger Snaps:
Makes roughly 7 dozen cookies!
1 1/2 cups butter
2 cups sugar
3/4 cup molasses
2 eggs
4 1/2 cups flour
4 tsp baking soda
1 tsp salt
4 tbsp ground ginger paste
2 tsp cinnamon
1 tsp ground nutmeg
1. Preheat oven to 375 degrees and line baking sheets with parchment.
2. Cream butter and sugar until fluffy. Add molasses and eggs and mix well.
3. Sift together flour, baking soda, salt, cinnamon, and nutmeg. Add dry ingredients to butter mixture in batches and mix thoroughly. Lastly, blend in the ginger paste.
4. Drop dough by teaspoonful onto baking sheets, about 2 inches apart.
5. Bake for 10-12 minutes. Cool 2-3 minutes on the baking sheet before transferring to a wire rack.
Notes: Cookies will be crisp but not hard, adjust time as desired for slightly softer/harder cookies. I've had a comment from a reader who asked about the ginger paste. The kind I use is in a tube, similar to this brand. I find mine in the produce section of my local grocery store and the stuff stores beautifully in the freezer for a few months (its still squeezable!). If you can't find tube based, you might also find it in jars in the "Ethnic Foods" section, but you should check the ingredients to make sure it doesn't include garlic or other ingredients that might not work in a cookie recipe. You can always use ground ginger from your spice rack (~1 tbsp depending on how strong it is) and some finely chopped candied ginger. I'll probably make a post about the ginger paste and its usefulness later this week for those who would like more details.
The results?
They're just like I remembered. Perfect size, color, shape, texture and most importantly, taste.
What I like most about using the ginger paste over ground ginger is that you can still see the flecks of ginger in the cookie after its baked. You could use ground ginger along with candied ginger though, but then you would want to chop the candied ginger into finer pieces.
So, I hope you all enjoy the first recipe for this blog. More will be added shortly so I hope you come back and find some new/interesting/possibly odd recipes to try at your own home. And don't forget to check out all the other recipes submitted for Eat Christmas Cookies. I know I have a few on my weekend/vacation to-do list now. Oh, and comments are highly encouraged! Take care.
Sunday, December 7, 2008
Ladies and gentlemen, boys and girls, I give you...
Oh crap, what do I say? How do I begin...???
Um..
First post!!! whooooot!!!!!1!!1one!
Ok, so now that thats over, let get on with this. Welcome to my newly dedicated blog, Trial By Food. I created this blog with the goal to share my general thoughts, knowledge, and experiences with food. I don't doubt that other facets of my life will leak in here and there, but I'll try to keep on topic as much as possible. I was really hoping to start this baby off with a few recipes, but alas I lost my charger for my camera and thus don't have any pictures of anything. But fear not, they will be posted as soon as I can manage, with or without pics. So, thats my intro, and for anyone who stops by to read this, thank you. And please, come back again if you enjoy it.
P.S. Just to give a heads up, first recipe will be on ginger snaps!
Subscribe to:
Posts (Atom)